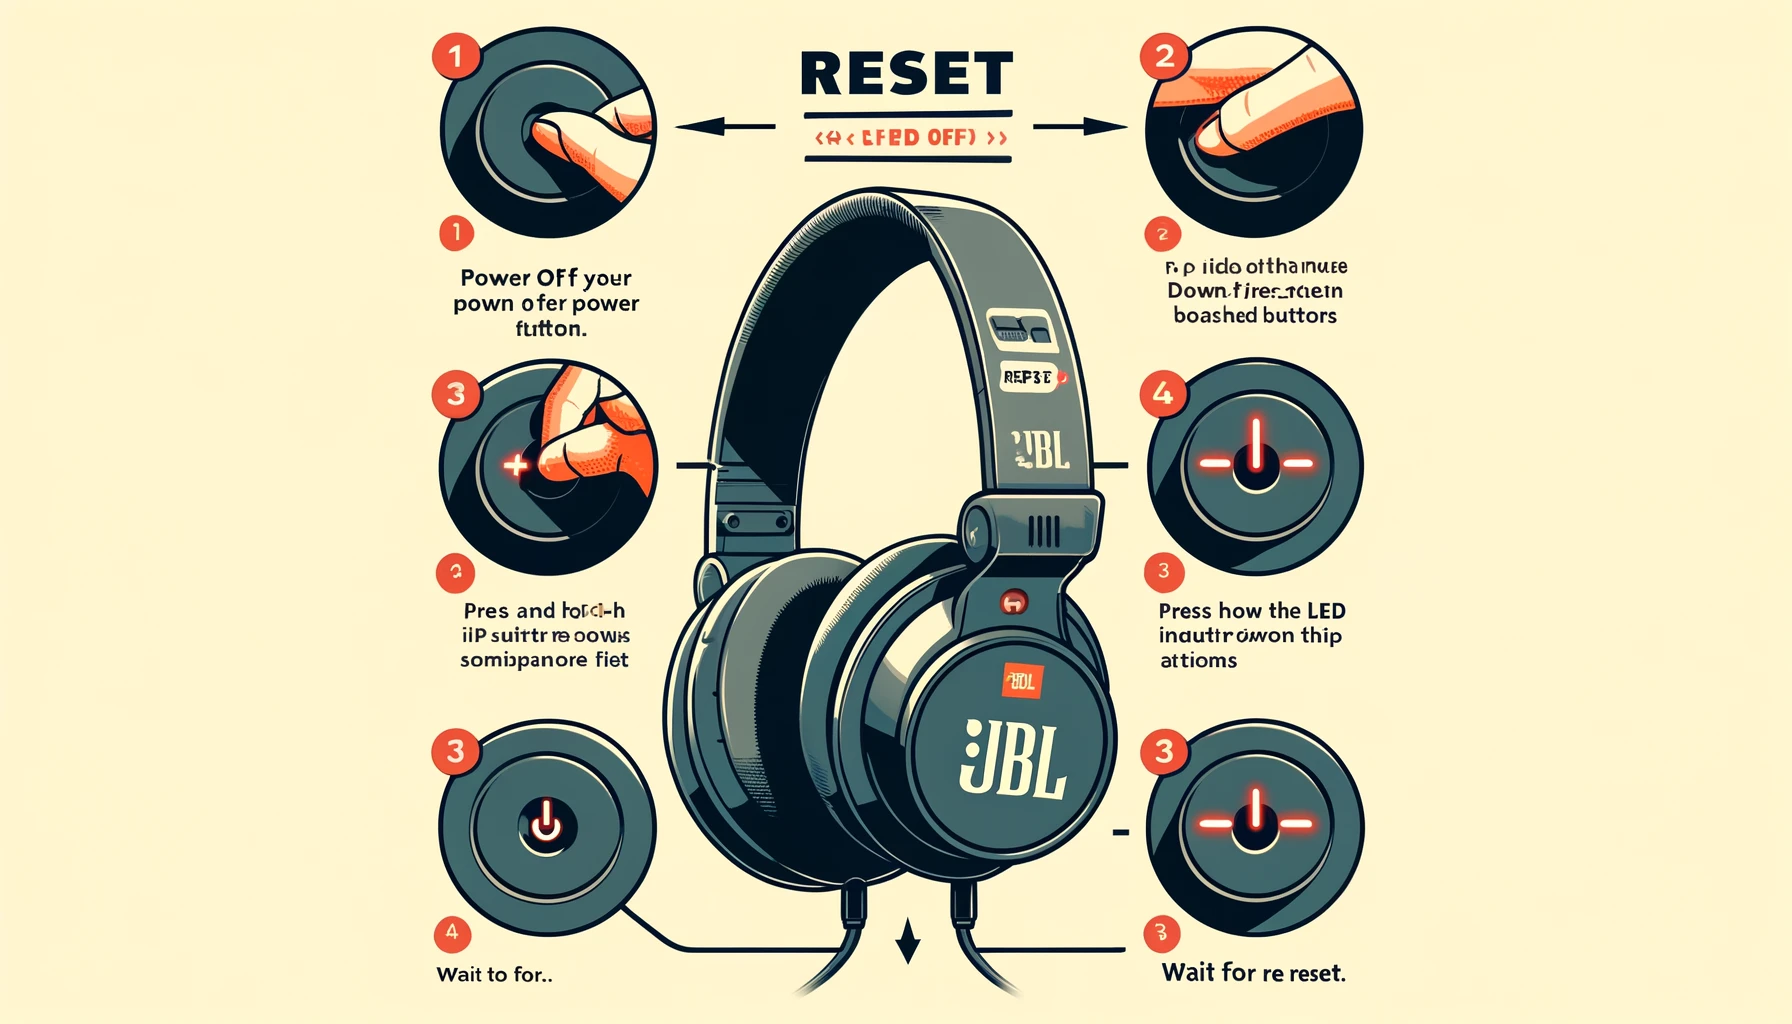
How to Reset JBL Tune 760NC: Soft & Hard Reset

How to Reset JBL Tune 760NC

This article addresses common issues with JBL Tune 760NC headphones, including pairing, charging, one-sided sound, and turning off problems. Solutions include both hard and soft reset methods.  Hard reset resets to default settings, while soft reset retains data. For each type of reset, detailed steps are mentioned, ensuring users can resolve problems effectively and restore headphone functionality. Errors That Can Be Fixed By Resetting JBL Tune 760NC Not Pairing Issue Many JBL Tune 760NC users encounter issues with their headphones not pairing correctly, such as the right or left earbud not pairing. This is a common problem faced by JBL users.  If you’re experiencing this issue and want to fix it, there are various methods discussed to do this. One effective solution is to reset your JBL Tune 760NC. Not Connecting To APP Issue Many users are having trouble connecting their JBL Tune 760NC headphones to their devices. There are several methods to fix this error, and I have provided detailed steps for fixing JBL Tune 760NC headphones not connecting to the JBL App.  However, if you’re still unable to resolve the issue, performing a reset might be necessary. By following the given resetting steps, you can potentially fix this error. Not Charging Issue Some of the users complain that their JBL Tune 760NC headphones are not charging. They apply serious methods to charge their headphones, but at last they see that their headphones are not charging and their battery almost dies and the headphones don’t even turn on.  So if you are also facing JBL Tune 760NC not charging issues, I would suggest resetting your headphones to fix the error. JBL Tune 760NC One Side Not Working Issue The JBL Tune 760NC user is facing an issue where sound is only coming from one side of their headphones. When sound is coming from the right headphone, it doesn’t come from the left one.  Although there are various methods to fix this error, one method is to reset the JBL Tune 760NC  headphones. Performing a reset is a good way to fix this issue by following the steps provided in the article. Hard Reset JBL Tune 760NC If you want to perform a hard reset on your JBL Tune 760NC headphones, remember that hard resetting will result in the loss of saved data, and your headphones will revert to their default settings.  If you still want to proceed with a hard reset, follow the steps below: Make sure your headphones are turned on. Press and hold the Volume Up and Volume Down buttons simultaneously. Take note of the LED light The LED light will turn off. Release the buttons after the LED light turns off. After that LED light will turn on again immediately. Your JBL Tune 760NC headphones have now undergone a hard reset. Soft Reset JBL Tune 760NC If you want to perform a soft reset on your JBL Tune 760NC headphones, you can do it with just one step. A soft reset is similar to a power cycle and helps resolve issues without deleting saved data. To perform a soft reset, follow these simple steps: Disconnect your JBL Tune 760NC headphones from all devices. Press and hold the power button to turn off your headphones. Wait for 10 seconds. After 10 seconds, turn on your headphones by pressing the power button again. Congratulations! Your headphones have now been soft reset. Read Here: How to Reset JBL Tune 660NC Jbl 760NC Headphones Not Turning Off: Fix It It seems like many users are experiencing difficulties with their JBL Tune 760NC headphones not turning off. If your headphones aren’t turning off, the battery will eventually drain, leading to them becoming unusable.  It’s important to turn them off when not in use.  However, if the power button isn’t responding to turn them off, and you’re facing this issue, it’s recommended to charge your JBL Tune 760NC headphones for some time. After around 10 seconds of being connected to the charger, the headphones should automatically turn off. Conclusion In conclusion, by following the provided troubleshooting steps and reset methods, users can effectively address common issues encountered with JBL Tune 760NC headphones.  Whether facing pairing difficulties, charging issues, one-sided sound problems, or difficulties in turning off the headphones, the outlined solutions offer practical remedies.  With a combination of hard and soft reset options, users can restore their headphones to optimal performance and enjoy uninterrupted audio experiences. Aneeq Aish ChoudharyAneeq Aish takes immense pride in being a dedicated researcher, committed to helping individuals like you make well-informed and decisive choices before purchasing or fixing any sound-related equipment like headphones & speakers. decisivesound.com

How To Fix JBL Tune 760NC Not Charging Issue

How To Fix JBL Tune 760NC Not Charging Issue

Facing charging issues with your JBL Tune 760NC headphones? This guide offers solutions. Learn how to charge your headphones correctly, understand recommended charging times, and troubleshoot common problems like a faulty charging port, cable, battery, or dust accumulation.  Discover step-by-step solutions to resolve charging issues and ensure uninterrupted listening experiences. From cleaning the charging port to replacing components, this guide has you covered. How To Charge JBL Tune 760NC If you want to charge your JBL Tune 760NC headphones, open the box to find a Type-C charging cable. It will have two ends: one for connecting to the headphone’s charging port and the other for plugging into the adapter.  Plug the adapter into a power source, then connect the cable to your headphones. Charging will commence once everything is connected properly. Charging Time & Battery Life JBL Tune 760NC If you want to charge your JBL Tune 760NC headphones properly, it’s recommended to charge them for at least 2 hours. This ensures they are fully charged and ready for use. After charging, you can use them for up to 50 hours, but this duration applies only when the ANC feature is turned off.  If you prefer to use your headphones with ANC features enabled, your playtime will be approximately 35 hours. Pair JBL Tune 760NC headphones to your device & enjoy your extended playtime with or without ANC! Why JBL Tune 760NC Not Charging Faulty Charging Port One potential reason why your JBL Tune 760NC headphones may not be charging is a faulty charging port. If the charging port is damaged or defective, it can prevent the headphones from receiving power and charging properly. You will receive the JBL Tune 760NC not charging issue. Faulty Cable Another possible reason why your JBL Tune 760NC headphones may not be charging is a faulty cable. If the charging cable is damaged or defective, it can disrupt the charging process and prevent the headphones from receiving power.  Inspecting the cable for any signs of wear, fraying, or internal damage is advisable to determine if it is the cause of the charging issue. Battery Problem A potential reason for your JBL Tune 760NC headphones not charging could be a battery problem.  If the battery is faulty or deteriorating, it may not hold a charge or accept power properly, leading to charging issues. Dust Problem Dust accumulation in the charging port can also hinder the charging process for your JBL Tune 760NC headphones. Over time, dust and debris may gather inside the port, obstructing the connection between the charging cable and the headphones.  This blockage can prevent the proper transfer of power, resulting in charging issues.  Fix JBL Tune 760NC Not Charging Issue Clean The Charging Port To clean the charging port of your JBL Tune 760NC headphones, follow these steps: Before cleaning, ensure your JBL Tune 760NC headphones are powered off to avoid any potential damage. Gently blow compressed air into the charging port to dislodge any dust or debris. Hold the canister upright and use short bursts to avoid damaging the port. If compressed air isn’t available, use a clean, soft brush (like a toothbrush or a small paintbrush) to carefully sweep away any visible dust or debris from the port. Refrain from using any liquid cleaners or solvents, as these may damage the delicate electronic components inside the port. After cleaning, visually inspect the charging port to ensure it’s free from any remaining debris. If there’s still debris present, repeat the process until the port appears clean. Once the port is cleaned, test the device to ensure it’s charging properly. By following these steps, you can effectively clean the charging port of your device and maintain optimal charging performance. Change The Charging Cable If your charging cable is damaged or faulty, it may be the reason why your device is not charging properly. It’s essential to replace the cable with a new one to address this issue effectively.  Once you’ve obtained a new cable, connect it to your device and attempt to charge it again. By using a functional charging cable, you can troubleshoot and resolve the charging problem. Change The Battery If your JBL Tune 760NC headphones still aren’t charging, it’s possible that the battery may have completely drained. In this case you have to change the battery.  Carefully open the JBL Tune 760NC and check if the battery is visible. First plug in and plug out the battery and start charging your JBL Tune 760NC headphones, if your headphone is still not charging then you should replace the battery.  Reset Your Headphones Resetting your JBL Tune 760NC headphones can often resolve various errors, including the “not charging” issue.  In our article, we provided detailed steps to reset JBL Tune 760NC headphones. By resetting your headphones, you can potentially address charging issues and other related errors, ensuring optimal performance and functionality. Read Here: Fix JBL Tune 660NC Not Charging Issue Conclusion Troubleshooting and fixing the “not charging” issue with your JBL Tune 760NC headphones is essential for uninterrupted listening experiences.  By following the steps outlined in this guide, including proper charging procedures, identifying potential reasons for charging problems, and implementing effective solutions such as cleaning the charging port or replacing components, you can ensure optimal performance of your headphones.  Take charge of your charging issues today and enjoy hassle-free listening with your JBL Tune 760NC headphones. Aneeq Aish ChoudharyAneeq Aish takes immense pride in being a dedicated researcher, committed to helping individuals like you make well-informed and decisive choices before purchasing or fixing any sound-related equipment like headphones & speakers. decisivesound.com

How to Pair JBL Tune 760NC: A Complete Guide

How to Pair JBL Tune 760NC

This article provides a comprehensive guide on how to pair JBL Tune 760NC headphones with various devices such as Android phones, iPhones, and laptops via Bluetooth. It covers step-by-step instructions for putting the headphones in pairing mode and connecting them to different devices.  Additionally, troubleshooting tips are provided for common issues such as the headphones not appearing in Bluetooth menus or not connecting to the JBL app.  My article suggests solutions like updating the device, resetting the headphones, and contacting customer support if necessary. It also explains the importance of allowing permissions when connecting the headphones to the JBL app.  Overall, the article aims to help users successfully pair their JBL Tune 760NC headphones with their preferred devices and address any connectivity issues they may encounter. Put JBL Tune 760NC Into Pairing Mode If you want to connect your JBL Tune 760NC headphones to a device, you need to put them in pairing mode first. When they are in pairing mode, they will appear in the Bluetooth options, allowing you to connect. Follow these steps to put your JBL Tune 760NC headphones in pairing mode: First, power off your headphones. There will be a power button on your headphones. Press and hold this button for 5 seconds to power them off. Wait a few seconds, then press and hold the button again for 5 seconds to power them on. If the light on your JBL Tune 760NC headphones starts blinking, they are now in pairing mode. You can now connect your headphones to your device. We hope this helps you connect your headphones successfully. Pair JBL Tune 760NC To Android If you are an Android user & want to connect your JBL Tune 760NC to your Android device, please follow the steps below: First, turn on the Bluetooth on your Android device.  To do this, go to the settings on your Android device. Find and click on the Bluetooth option. Inside the Bluetooth settings, there will be a button to turn Bluetooth on.  Click on it to enable Bluetooth. Your device will start searching for available devices to connect to. Look for the name of your JBL Tune 760NC in the list of available devices. Once you find the name of your earbuds, click on it to connect your Android device to your earbuds. Now, you have successfully connected your JBL Tune 760NC to your Android device. Pair JBL Tune 760NC To Iphone If you are an iPhone user and want to connect your headphones to your iPhone, follow these steps: First, make sure that your headphones are in pairing mode. Once your headphones are in pairing mode, turn on the Bluetooth on your iPhone. To turn on Bluetooth on your iPhone, follow these steps: Go to the settings on your iPhone. Find and click on the Bluetooth option. Enable Bluetooth by clicking on the Bluetooth toggle. After enabling Bluetooth, your iPhone will start searching for available devices to connect to. In the list of available devices, you should see the name of your JBL Tune 760NC. Make sure your headphones are within range of your iPhone. Click on the name of your headphones to connect them to your iPhone. Now, your headphones should be successfully connected to your iPhone. Read Here: Fix JBL Tune 760NC Not Charging Issue Pair JBL Tune 760NC To Laptop If you want to connect your headphones to your laptop, follow these steps: First, make sure your headphones are in pairing mode. Enable Bluetooth on your laptop and search for available devices. To turn on Bluetooth on your laptop: Click on the Windows icon. Go to the settings option. In the settings menu, you will see many options. Click on “Devices.” Then, you will see the Bluetooth button. Turn it on. Your laptop will start searching for available devices. In the list of available devices, you should see the name of your JBL Tune 760NC headphones. Click on the name of your headphones to connect them to your laptop. Now, your headphones should be successfully connected to your laptop. JBL Tune 760NC is Not Shown in The Bluetooth Menu Make Sure They Are In Pairing Mode If your JBL Tune 760NC is not showing as available devices, there could be various reasons for this. It’s possible they are not in pairing mode. If they’re not in pairing mode, they won’t be discoverable and won’t show up as available devices.  Therefore, I suggest checking if they are in pairing mode. If they’re not, try to bring them in pairing mode and then attempt to connect again. Update Your Phone If you’re unable to connect your JBL Tune 760NC headphones to any available device via Bluetooth because your headphone’s name doesn’t appear in the available devices list, don’t worry.  It could be due to technical issues. I suggest updating your Phone because updating the phone can refresh the system and potentially fix any errors you’re facing.  After updating your device, android or iphone, your headphones should be able to connect to your available devices seamlessly, and you shouldn’t encounter any errors. Reset Your Headphones If you’re experiencing pairing issues with your headphones after trying all the methods, I suggest you reset your JBL Tune 760NC headphones. Resetting them can often resolve various issues and bring them back to their original state.  You can find detailed instructions on how to reset JBL Tune 760NC headphones in our dedicated article. Following those steps should greatly benefit you. Contact The Customer Support If you have followed all the steps but still encounter errors, please contact customer support. The customer support will provide you with better guidance. If you have a warranty, you can also replace your JBL Tune 760NC headphones. How to Connect JBL Tune 760NC to App Just like any other app, the JBL app is designed to provide JBL users with additional features after connecting their headphones through the app. Connecting JBL Tune 760NC headphones with the JBL app has become easier now.  However, some people face … Read more

Fix JBL TUNE 220 TWS One Side ( Left or Right ) Not Working

Fix JBL TUNE 220 TWS One Side ( Left or Right ) Not Working

Experiencing one side of your JBL TUNE 220 TWS one side not working can be frustrating, but there are several solutions to address this issue.  Whether the problem lies with the right or left earbud, this guide provides detailed steps to fix the problem, ensuring that both earbuds function correctly and deliver high-quality sound.  From charging tips to resetting your earbuds, we cover a range of troubleshooting methods to help you resolve the JBL TUNE 220 TWS one side not working efficiently. JBL TUNE 220 TWS Right Earbud Not Working The JBL Tune 220 TWS right earbud sometimes doesn’t work, meaning no sound comes from it, and it doesn’t connect. This can make you think the right earbud is not functioning at all. You may report a right earbud not working issue. JBL TUNE 220 TWS Left Earbud Not Working The JBL Tune 220 TWS left earbud sometimes doesn’t work, meaning no sound comes from it, and it doesn’t connect. This can make you think the left earbud is not functioning at all, leading to the JBL Tune 220 TWS left earbud not working.  To fix this issue, follow the steps we have provided and you can resolve the left earbud not working problem. Fix JBL TUNE 220 TWS One Side Not Working Charge The Faulty Ear Bud First It is possible that your right earbud is not working because it is not charged. First, place your right earbud in the charging case and let it charge fully.  Hopefully, this will resolve the JBL Tune 220 TWS right earbud not working issue, and the right earbud will start working.  If your left earbud is also not working, you can fix the issue by charging the left JBL Tune 220 TWS earbud fully as well. If you are facing charging related issues please fix JBL TUNE 220TWS Not Charging Issue. Power off & On One by One Here are the steps you can take to address the JBL Tune 220 TWS one side not working issue by powering off and on your buds one by one. Turn off your earbuds. Press and hold the button on your right earbud for 2 to 3 seconds until it powers off. Then, do the same for the left earbud by pressing and holding the button for 5 seconds until it powers off. After turning them off, turn on the earbud that is not working. If you are facing the “right JBL Tune 220 TWS earbud not working” issue, turn on the right earbud first. If you are facing the “left JBL Tune 220 TWS earbud not working” issue, turn on the left earbud first. To turn them on, follow these steps: Press and hold the button on the earbud for 2 seconds, then release it. A white light will blink. Immediately tap on the button three times. After this, release the button. The earbud will enter pairing mode, and JBL Tune 220 TWS will pair  without any issues. By following these steps, you should be able to resolve the JBL Tune 220 TWS one side not working issues with your earbuds. Disconnect & Reconnect If you are facing the “right earbud not working” issue, first disconnect the right earbud. You can do this by turning off your device’s Bluetooth or by powering off the right earbud itself. Once disconnected, turn your earbud back on and reconnect it to your device. If you are facing the “left earbud not working” issue, follow the same steps to disconnect the left earbud. Turn off your device’s Bluetooth or power off the left earbud to disconnect it. Then, turn the earbud back on and pair JBL Tune 220 TWS to your device again. Reset JBL TUNE 220 TWS You can fix various errors, including JBL Tune 220 TWS one side not working, by resetting your earbuds. Resetting is a common method used to troubleshoot problems and restore devices to their default settings. If you want to learn more details about how to reset your JBL Tune 220 TWS earbuds, you can read our article on the topic. Keep Audio Balanced First, ensure that the audio on your device is balanced, as sometimes imbalance can cause one earbud to produce louder sound while the other remains quiet. If you suspect that your earbud is not working properly, it’s important to balance the audio on your device. Follow these steps to balance the audio: Open your device’s settings. Locate the audio balance option. Adjust the audio balance slider to the center position to ensure sound is equally distributed between both earbuds. Conclusion By following the steps outlined in this guide, you can effectively troubleshoot and resolve issues with one side of your JBL TUNE 220 TWS earbuds not working.  From ensuring the earbuds are fully charged to resetting them and balancing the audio, these methods cover a range of solutions to help restore optimal functionality.  Implement these tips to enjoy uninterrupted, high-quality sound from both earbuds, and refer back to this guide whenever you encounter similar issues in the future. Aneeq Aish ChoudharyAneeq Aish takes immense pride in being a dedicated researcher, committed to helping individuals like you make well-informed and decisive choices before purchasing or fixing any sound-related equipment like headphones & speakers. decisivesound.com

How To Reset JBL TUNE 220TWS: Step By Step Guide

How To Reset JBL TUNE 220TWS Step By Step Guide

The JBL TUNE 220TWS True Wireless In-Ear Headphones are renowned for their high-quality sound and user-friendly features, but like any electronic device, they can occasionally encounter issues.  Common problems such as not charging, one side not working, and pairing issues can often be resolved by resetting the earbuds.  This step-by-step guide provides detailed instructions on how to perform both a factory reset and a soft reset on your JBL TUNE 220TWS, ensuring you can quickly restore them to optimal working condition. JBL TUNE 220TWS: Quick Overview The JBL TUNE 220TWS True Wireless In-Ear Headphones feature JBL Pure Bass Sound with a 12.5mm driver, delivering standout audio quality.  These earbuds offer a true wireless experience, compatible with both Apple iPhone and Android devices, providing wire-free music and hands-free calls.  Convenient on-ear controls allow you to switch tracks, use voice commands, and take calls effortlessly. Designed for comfort, these ergonomic earbuds are perfect for all-day wear at the office, gym, or home. Errors That Can Be Fixed By Resetting JBL TUNE 220TWS JBL TUNE 220 TWS Not Charging Issue Many JBL TUNE 220 TWS users face issues with their earbuds not charging. This issue can manifest as either the right earbud or the left earbud not charging, or the case itself not charging.  It’s a common problem among JBL users. If you want to fix the not charging issue, there are different methods to try. We have discussed these methods in detail in our article on how to fix JBL TUNE 220 TWS not charging issues.  One of the methods is resetting your earbuds, which can help resolve the not charging issue. JBL TUNE 220 TWS One Side Not Working Issue Many JBL users face issues with their JBL TUNE 220 TWS earbuds not working. This problem can occur when either the right earbud or the left earbud doesn’t work.. It’s a common issue among JBL TUNE 220 TWS users.  If you want to fix the JBL TUNE 220 TWS not working issue, there are different methods to try. We have discussed these methods in detail in our article on how to fix JBL TUNE 220 TWS not working issues.  One of the methods is resetting your JBL TUNE 220 TWS earbuds, which can help resolve the not working issue. JBL TUNE 220 TWS Not Pairing  Many JBL TUNE 220 TWS users face pairing issues, where either the right or left earbud fails to pair. This is a common error among JBL users. If you are also experiencing JBL TUNE 220 TWS pairing issues and want to fix them, there are different methods you can try.  We have discussed these methods in detail in our article on how to pair JBL TUNE 220 TWS. One of the methods is resetting your earbuds, which can help resolve pairing issues.  Read Here: JBL TUNE 220 TWS Review Things To Consider Before Resetting JBL TUNE 220TWS To reset your JBL TUNE 220 TWS earbuds, first make sure the earbuds are fully charged. If the battery is low, the earbuds may power off during the reset process, which would prevent the reset from completing.  Therefore, it is essential to fully charge the battery before attempting to reset the earbuds. Factory Reset JBL TUNE 220TWS If you want to factory reset JBL TUNE 220 TWS, please follow the steps given below. Place your JBL TUNE 220 TWS earbuds in the charging case.  Then, press and hold the button on the right JBL TUNE 220 TWS earbud for 5 seconds.  Watch for the LED indicator to confirm the reset.  After releasing the button, your earbuds will be factory reset.  This will return them to their default settings, and any saved data may be lost, so proceed with caution. Read Here: how to Reset JBL Tune 760NC Soft Reset JBL TUNE 220TWS First, take your JBL TUNE 220 TWS earbuds and press the button on the right earbud for 5 to 10 seconds to turn it off.  Place it in the charging case. After 10 seconds, remove it from the charging case and press the button on the right earbud for 10 seconds to turn it on.  Doing this will perform a soft reset on your earbuds. Read Here Which One Is Best: JBL Tune 220 TWS vs JBL Tune 225 TWS Read Here Which One Is Best: Tune 220 TWS vs Airpods Conclusion Resetting your JBL TUNE 220TWS earbuds can effectively resolve common issues such as charging problems, one side not working, and pairing difficulties.  By following the steps provided in this guide, you can perform both a factory reset and a soft reset to restore your earbuds to optimal functionality. Always ensure your earbuds are fully charged before attempting a reset to avoid interruptions.  With these troubleshooting methods, you can enjoy uninterrupted, high-quality audio from your JBL TUNE 220TWS earbuds. If problems persist, refer back to this guide for detailed instructions and solutions. Aneeq Aish ChoudharyAneeq Aish takes immense pride in being a dedicated researcher, committed to helping individuals like you make well-informed and decisive choices before purchasing or fixing any sound-related equipment like headphones & speakers. decisivesound.com

How To Fix JBL TUNE 220 TWS Not Charging Issue

How To Fix JBL TUNE 220 TWS Not Charging Issue

Encountering charging issues with your JBL TUNE 220 TWS earbuds can be frustrating, but these problems are often solvable with a few simple steps.  This comprehensive guide provides detailed instructions on how to charge your JBL TUNE 220 TWS earbuds, troubleshoot common charging issues.  By following these steps, you can ensure your earbuds are always ready to deliver an exceptional audio experience. How To Charge JBL Tune 220 TWS If you want to charge your JBL Tune 220 TWS, I suggest the following steps: First, charge your JBL Tune 220 TWS earbuds case. When your ear case is fully charged, place the earbuds inside the case, and they will start charging automatically. To charge the ear case, use the charging cable provided in your box.  Connect one end of the charging cable to the case and the other end to your adapter.  Plug in the adapter, and press the button on your ear case to start charging.  There are usually three lights on the JBL Tune 220 TWS case that indicate the charging level. If all three lights are on, it means the case battery is fully charged. When 1 or 2 lights are on, it indicates that the case battery is not fully charged.  Once the case battery is fully charged, place your earbuds inside the case.  The white light on the earbuds will show that they are charging. When your earbuds are fully charged, the white light will turn off. This way, you can charge your earbuds efficiently. Charging Time & Battery Life of JBL Tune 220 TWS The battery life of JBL Tune 220 is around 19 hours, which means if you fully charge your earbuds, they can last for 19 hours easily. You can also use your earbuds continuously with Bluetooth connectivity for up to 3 hours without the charging case.  After that, you can pair JBL Tune 220 earbuds with various devices and use them for another 16 hours by placing them back in the charging case and using it. Compare: JBL Tune 220 TWS vs JBL Tune 225 TWS JBL Tune 220 TWS Charging Related Issue JBL Tune 220 TWS – Left or Right Earbud Not Charging Some users encounter issues where either their left or right JBL Tune 220 TWS earbuds are not charging. This error may also initiate JBL TUNE 220TWS one side not working Issue.  Some users report that their left earbud charges while the right one does not, while others mention that their right earbud charges but the left one does not.  For detailed information on how to fix these left and right earbuds not charging issues, please keep reading our article. Jbl Tune 220 TWS Battery Draining Some users experience issues where, despite fully charging their ear case and leaving it unused, the battery level starts dropping.  It goes from level 3 to 2 and then to level 1 before the battery eventually dies. This is a common issue faced by JBL Tune 220 TWS users. If you are facing battery issues with your JBL Tune 220 TWS, below are the steps to address the JBL Tune 220 TWS not charging issues. Please read them carefully: Fix JBL Tune 220 TWS Charging Related Issue Apply Some Pressure When you put your JBL Tune 220 TWS in the charging case, sometimes the connection between the earbud and the charging connector in the case doesn’t establish properly.  To establish the connection, push the earbud slightly downwards towards the bottom so that it fits properly inside the ear case and the charging connector’s connection is established correctly.  This should start the charging process. Clean The Earbuds and Case Sometimes, the connecting points of your earbuds and the connector of the ear case can become dirty, causing them to not establish a proper connection. Dust or dirt particles can accumulate on them, or they may get sticky. To clean them properly, follow these steps: Start by taking a cloth and gently wipe the connector and JBL Tune 220 TWS earbuds to remove any visible dirt or debris. Then, take a cotton swab and dip it in alcohol. Ensure the cotton swab is not dripping wet but slightly damp with alcohol. Use the alcohol-dipped cotton swab to carefully clean the connector and earbuds, ensuring you reach into any crevices or corners where dirt may have accumulated. After cleaning with alcohol, take a dry cloth and wipe off any excess moisture from the connector and earbuds. Now, try charging your earbuds again. Hopefully, after this cleaning process, your earbuds will charge properly. Read Here: Fix JBL Tune 760NC Not Charging Issue Change The Battery  If you think your battery is dead, you should consider replacing it. You can find replacement batteries online from various forms like Google or social media. You can also inquire about battery replacement near your local shop.  After obtaining a new battery, gently open your earbud. Opening it gently shouldn’t cause any issues. Inside, you’ll find the battery. Unplug the old battery and replace it with the new one you’ve obtained. Change The Charging Cable Sometimes, your charging case may not be fully charged, which can prevent your JBL Tune 220 TWS from charging. One reason for this could be a faulty charging cable.  Therefore, try changing your charging cable and use a new one. Then, attempt to charge your case. After that the case will be able to charge your JBL Tune 220 TWS. Compare: JBL Tune 220 TWS vs Apple Airpods Reset The Earbuds You can fix the JBL Tune 220 TWS not charging issue by resetting your earbuds. Resetting can help resolve many errors. There are various steps to reset your earbuds, and we have provided each step in a detailed article on how to reset the JBL Tune 220 TWS earbuds. Please read that and follow the suggestions carefully. Conclusion By following the steps outlined in this guide, you can effectively address and resolve charging issues with your JBL TUNE 220 TWS earbuds. We’ve covered essential … Read more

How To Pair JBL TUNE 220 TWS: Fix Pairing Issue Too

Pair JBL TUNE 220 TWS

Users often encounter issues when attempting to pair JBL TUNE 220 TWS earbuds with their devices.  This comprehensive guide aims to address these common pairing issues and provide step-by-step instructions for successfully connecting your JBL TUNE 220 TWS earbuds to various devices, including Android phones, iPhones, and laptops.  Additionally, we’ll explore solutions for resolving common problems such as the earbuds not appearing in the available devices list or failing to pair with each other.  By following the detailed instructions and troubleshooting tips in this article, you can ensure a smooth and hassle-free pairing experience with your JBL TUNE 220 TWS earbuds. Enter JBL TUNE 220 TWS Into Pairing Mode If you want to connect your JBL TUNE 220 TWS earbuds to any device, it’s important that they are in pairing mode first. If they are not in pairing mode, the first step is to put them into pairing mode. To Put your JBL TUNE 220 TWS earbuds into pairing mode, please follow the below given steps: First, ensure that your JBL TUNE 220 TWS earbuds are turned off. If they are not turned off, press and hold the button on the right earbud for 5 seconds to turn it off.  Then, press and hold the button on the right earbud for another 5 seconds.  You will notice that the blue and red lights on your earbuds start flashing.  This indicates that your earbuds have entered pairing mode, and you can now connect them to your device. Read Here: How To Fix JBL TUNE 220TWS Not Charging Issue Pair JBL TUNE 220 TWS To Android Now that you have put your JBL TUNE 220 TWS in pairing mode, and you want to connect them to your Android device, follow these steps: First, turn on Bluetooth on your Android device.  Go to the Bluetooth settings of your Android device by accessing the settings menu.  There, click on the Bluetooth option.  If Bluetooth is not already on, toggle the button to turn it on. Once Bluetooth is on, your Android device will start searching for available devices to pair with. Open the available devices list and look for your JBL TUNE 220 TWS. Once you see your JBL TUNE 220 TWS listed, select them to initiate the pairing process. Follow any on-screen prompts or instructions to complete the pairing process between your Android device and your JBL TUNE 220 TWS. Once paired, your Android device will be connected to your headphones, and you can start using them together. You have now successfully connected your Android device to your JBL TUNE 220 TWS. Pair JBL TUNE 220 TWS To Iphone If you are an iPhone user and you want to connect your JBL TUNE 220 TWS to your iPhone, follow these steps: First, make sure that your headphones are in pairing mode. After putting them in pairing mode, turn on Bluetooth on your iPhone.  To turn on Bluetooth on your iPhone, follow these steps: Go to the Settings app on your iPhone. Scroll down and tap on “Bluetooth”. Toggle the switch to turn on Bluetooth. Once Bluetooth is enabled on your iPhone, it will start scanning for available devices to pair with. Look for your headphones in the list of available devices. Make sure that your headphones are within range of your iPhone. When you see your JBL TUNE 220 TWS listed under available devices, tap on their name to initiate the pairing process. Follow any on-screen prompts or instructions to complete the pairing between your iPhone and your headphones. Once the pairing is successful, your iPhone will be connected to your JBL TUNE 220 TWS, and you can start using them together. You have now successfully connected your JBL TUNE 220 TWS to your iPhone. Pair JBL TUNE 220 TWS To Laptop If you want to connect your JBL TUNE 220 TWS to your laptop, follow these steps: Firstly, make sure that your headphones are in pairing mode. Once they are in pairing mode, enable Bluetooth on your laptop. To turn on Bluetooth on your laptop, follow these steps: Click on the window icon at the bottom left corner.  Go to the settings menu. Here click on the devices option. Once you find the Bluetooth icon, click on it to turn on Bluetooth. After turning on Bluetooth on your laptop, it will start searching for available devices. Search for your JBL TUNE 220 TWS in the list of available devices. Make sure your headphones are discoverable and within range of your laptop. Once the pairing is successful, your laptop will be connected to your JBL TUNE 220 TWS, and you can start using them together. Compare: JBL Tune 220 TWS vs 225 TWS Common JBL TUNE 220 TWS Not Pairing Issue JBL TUNE 220 TWS Not Showing in Available Devices Some of the JBL TUNE 220 TWS users can put their earbuds into pairing mode, but they are not showing up under available Bluetooth devices. This issue can prevent them from connecting successfully due to the “not pairing” problem. JBL TUNE 220 TWS Not Pairing With Each Other Some users are facing difficulties in connecting their JBL TUNE 220 TWS with each other. They can connect their earbuds to the device individually but are unable to connect them to each other.  This issue leads to one side not pairing and various other errors. To fix this common error, follow the steps provided below: Compare Here: JBL Tune 220 TWS vs Airpods Fix Common JBL TUNE 220 TWS Not Pairing Issue Disconnect & Reconnect You can forget the device to fix JBL TUNE 220 TWS not pairing issues.  To forget the device, go to your device’s Bluetooth settings, find the entry for your earbuds, and press and hold on the name for 2-3 seconds until a pop-up appears.  From there, select the “Forget” option to remove your JBL TUNE 220 TWS from the list. Tap 2-3 Times on Earbuds If you’re facing a pairing issue with your JBL TUNE 220 TWS, take them … Read more

JBL TUNE 120 TWS One Side ( Left or Right ) Not Working

JBL TUNE 120 TWS One Side ( Left or Right ) Not Working

Experiencing sound from only one side of your JBL TUNE 120 TWS earbuds can be frustrating and can significantly impact your listening experience.  In this article, we address the common issue of one side (left or right) not working and provide detailed steps to fix it. We’ll cover various methods such as balancing the audio, turning off the wear detection feature, power cycling the earbuds, ensuring proper charging, pairing the faulty earbud first, and performing a reset.  By following these troubleshooting steps, you can restore full functionality to your JBL TUNE 120 TWS earbuds and enjoy uninterrupted audio. What Is JBL TUNE 120 TWS One Side ( Left or Right ) Not Working Issue The JBL Tune 120 TWS experiencing one side not working is a common issue where users can hear sound from one earbud but not from the other.  Sometimes, users may hear sound from the right earbud but not from the left, or vice versa.  Some users may experience sound from the left earbud but not from the right.  This inconsistency in sound output between the earbuds is why users report the JBL one side not working issue. Fix JBL TUNE 120 TWS One Side ( Left or Right ) Not Working Issue There are various methods to fix the JBL 120 TWS one side not working issue. I’ll explain each method in detail, so read and follow each step carefully. I hope that after following these steps, you’ll be able to fix the JBL Tune 120 TWS one side not working error: Keep Audio Balanced Firstly, you should try adjusting the audio balance on your device as sometimes imbalance can cause excessive sound in one earbud while the other produces no sound at all. Here are the steps to balance the audio on your device: Go to the settings of your device. Look for the audio balance option in the settings. Adjust the audio balance slider until it’s almost in the middle, ensuring that the audio balance is maintained and sound is equally distributed from both earbuds. Turn Off Wear Detection Feature Many earbuds come with a wear detection feature, which automatically turns off the earbuds if they are not properly fitted in your ears. This helps save battery life.  For example, if one JBL Tune 120 TWS earbud is securely in your ear and the other is slightly misplaced or not fitting well, the wear detection feature can detect this and turn off the earbud that is not properly fitted. To disable the wear detection feature, you can use your mobile’s companion app, such as the JBL app.  Turn Off & Turn On If you are facing an issue with one side of your JBL Tune 120 TWS earbuds, a great way to fix it is by turning them off and then on again. To do this: Turn off both earbuds by pressing and holding both buttons simultaneously for about 10 seconds. Release the buttons after 10 seconds and wait for about 5 seconds. After 5 seconds, press and hold both buttons again for 10 seconds, or quickly tap them 2 to 3 times. Your earbuds should turn on, and you’ll notice the blue light blinking, indicating that they are in pairing mode and ready to connect. Now, try connecting JBL Tune 120 TWS to the device again, and they should work properly on both sides. Charge The Bud Properly Sometimes, it happens that one earbud doesn’t charge properly because it’s not fitting correctly in the case. In such cases, I suggest trying the following steps: Remove the JBL Tune 120 TWS earbud that is not working properly from the case. Reinsert it into the case and ensure it fits securely and makes proper contact for charging. Let it charge for some time, as the issue might be due to a low battery. Once charged, start using it again and see if the sound starts working properly. If you are facing a non charging issue then check our article on how to fix JBL TUNE 120TWS not charging issue. By ensuring that the earbud fits well in the charging case and giving it some time to charge, you might be able to resolve the JBL Tune 120 TWS one side not working issue. Pair The Faulty Bud First If you are facing the “JBL Tune 120 TWS one side not working” issue, whether it’s the left earbud or the right earbud that’s not functioning, try the following steps to troubleshoot: Start by turning off Bluetooth on your device to disconnect the earbuds that are currently connected. Turn off both the earbuds.  Turn on the earbud first that was not working (e.g., the left earbud). Press and hold the button on the left earbud 2 to 3 times until it turns on. It should automatically pair after turning on. After the left earbud is paired, turn on the other earbud (e.g., the right earbud) and let it connect to the left earbud. Once both earbuds are connected to each other, proceed to connect JBL Tune 120 TWS to your device via Bluetooth. Following these steps should help resolve the one side not working issue. If the issue was with the right earbud, turn on the right earbud after turning on the left earbud. Reset JBL Tune 120 TWS  A great way to fix errors on earbuds is by resetting them. One common issue is the “one side not working” problem, which can often be fixed by resetting JBL Tune 120 TWS earbuds. There are various methods to reset JBL Tune 120 TWS earbuds. Conclusion Dealing with one side of your JBL TUNE 120 TWS earbuds not working can be a hassle, but with the right troubleshooting steps, it’s often an issue that can be resolved.  By balancing the audio, turning off the wear detection feature, power cycling the earbuds, ensuring proper charging, pairing the faulty earbud first, and performing a reset, you can restore the full functionality of your earbuds.  Following these methods will help … Read more

How To Pair JBL TUNE 120TWS: Fix Pairing Issue

How To Pair JBL TUNE 120TWS

Pairing your JBL TUNE 120TWS earbuds with your devices should be a straightforward process, but sometimes users encounter issues that prevent a successful connection.  In this article, we’ll guide you through the steps to put your earbuds into pairing mode, whether automatically or manually, and how to connect them to Android devices, iPhones, and laptops.  Additionally, we’ll address common pairing problems, such as the earbuds not pairing with a device or not pairing with each other, and provide effective solutions to resolve these issues, including forgetting the device, turning off and on again, and resetting the earbuds.  By following this comprehensive guide, you can ensure a seamless pairing experience with your JBL TUNE 120TWS earbuds. Put JBL TUNE 120TWS Into Pairing Mode If you want to pair your JBL TUNE 120 TWS earbuds with any device, the first and most crucial step is to put your earbuds into pairing mode. There are two ways to enter pairing mode: automatically and manually. Automatically Firstly, take your earbuds out of the charging case. They automatically power on and enter pairing mode when you take JBL TUNE 120 TWS out of the case.  You’ll notice a significant indicator: a blue light blinking on your earbuds. When the blue light starts blinking, it means your earbuds are in pairing mode. If your earbuds don’t enter pairing mode automatically, you can do it manually. Compare: JBL Tune 120 TWS vs 125 TWS Manually If your earbuds don’t enter pairing mode automatically and you need to enter pairing mode manually, follow these steps: Take your earbuds out of the charging case. If they are already on, turn them off by pressing and holding the button on top for 10 seconds until they turn off. Wait for 5 seconds after they turn off. Press and hold the button on top of your earbuds again for a few seconds. After a short while, you’ll see the blue light start blinking. Release the button after seeing the blue light blink. Your JBL TUNE 120 TWS earbuds should now be in manual pairing mode. Alternatively, you can tap the button on your earbuds 2 to 3 times and then release. This action should also put your earbuds into pairing mode. Read Here: JBL TUNE 120TWS Not Charging Issue Pair JBL TUNE 120TWS To Android Now that your JBL TUNE 120 TWS are in pairing mode, follow these steps to connect them to your Android device: Firstly, turn on Bluetooth on your Android device.  You can do this by going to the Settings menu on your Android device.  Then tapping on Bluetooth. Make sure the Bluetooth toggle is switched to “On”. Once Bluetooth is turned on, your Android device will start searching for nearby Bluetooth devices. Look for your JBL TUNE 120 TWS in the list of available devices. When you see your JBL TUNE 120 TWS listed, tap on their name to start the pairing process. Follow any on-screen prompts to complete the pairing. After successful pairing, your Android device should now be connected to your headphones, allowing you to use them for audio playback and calls. By following these steps, you have successfully connected your JBL TUNE 120 TWS to your Android device. Pair JBL TUNE 120TWS To Iphone If you’re an iPhone user and want to connect your JBL TUNE 120 TWS to your iPhone, follow these steps: Firstly, ensure that your headphones are in pairing mode. Once they are in pairing mode, proceed to the next steps. Open the Settings app on your iPhone and go to Bluetooth settings. Turn on Bluetooth by tapping the toggle switch to enable it. Once Bluetooth is enabled, your iPhone will start searching for nearby Bluetooth devices. Look for your headphones in the list of available devices. When you see your headphones listed, tap on their name to start the pairing process. Follow any on-screen prompts to complete the pairing. Once paired, your headphones should be connected to your iPhone. By following these steps, you have successfully connected your  JBL TUNE 120 TWS headphones to your iPhone. Compare: JBL Tune 120 tws vs Tune 220 tws Pair JBL TUNE 120TWS To Laptop If you want to connect your JBL TUNE 120 TWS to your laptop, follow these steps after ensuring that your headphones are in pairing mode: Enable Bluetooth on both your laptop and your headphones. On your laptop, click on the Window Icon at the bottom left corner. Go to the settings and select Devices. Here go to the Bluetooth settings option, make sure Bluetooth is turned on by clicking the toggle switch. Once Bluetooth is enabled on your laptop, it will start searching for available devices. Look for your headphones in the list of available devices. When you see your headphones listed, click on their name to start the pairing process. Follow any on-screen prompts to complete the pairing. Once paired, your headphones should be connected to your laptop. By following these steps, you have successfully connected your headphones to your laptop. JBL TUNE 120TWS Not Pairing Issues When you try to connect your JBL TUNE 120 TWS earbuds to your device, you may face two types of errors: Not Pairing With Device This error occurs when you try to connect your earbuds to your device, but they are not pairing successfully. Users often encounter the issue of their JBL TUNE 120 TWS earbuds not pairing with their Android or iPhone devices when attempting to connect. This can lead to “not pairing” issues. Not Pairing with Each Other Additionally, even if your earbuds successfully connect to your device, you may encounter another type of error. This error occurs when one earbud doesn’t connect with the other.  For example, the right JBL TUNE 120 TWS earbud may not connect to the left, or vice versa, resulting in sound only coming from one earbud while the other remains silent. This issue can also be frustrating to deal with. This will also initiate JBL TUNE 120TWS one side not working issue. … Read more

How To Reset JBL TUNE 120TWS: Step By Step

reset JBL TUNE 120TWS

Resetting your JBL TUNE 120TWS earbuds can be a simple yet effective solution for resolving various issues, from charging problems to connectivity errors.  In this article, we provide a comprehensive overview of the JBL TUNE 120TWS True Wireless In-Ear Headphones, highlighting their key features and benefits.  We then delve into common errors that can be fixed by resetting the earbuds, such as charging issues, pairing difficulties, and one-sided audio problems.  Finally, we guide you through the step-by-step processes for both factory resetting and soft resetting your JBL TUNE 120TWS earbuds, ensuring they function optimally once again. JBL TUNE 120TWS Overview The JBL TUNE 120TWS True Wireless in-Ear Headphones in white deliver a superior audio experience with the powerful JBL Pure Bass sound, ensuring every playlist sounds rich and immersive.  These Bluetooth earbuds provide the freedom to enjoy music, manage calls, and work out without the hassle of tangled wires, thanks to their true wireless design.  The integrated microphone and intuitive controls allow for effortless stereo hands-free calls and easy access to your voice assistant, enhancing convenience during daily commutes or workouts.  Plus, the variety of vibrant colors lets you express your personal style while enjoying all these practical benefits. Errors That Can Be Fixed By Resetting JBL TUNE 120TWS Users can reset their JBL TUNE 120 TWS earbuds for various reasons, with one of the most common being facing errors. I’ll list some common errors that may require you to reset your earbuds for fixing: JBL TUNE 120TWS Not Charging Issue One of the common errors that users can face with JBL TUNE 120 TWS is the charging issue. There are many ways to fix JBL TUNE 120TWS not charging Issue, and we have detailed these methods in a different article.  However, one effective way to fix this error is by resetting the JBL TUNE 120 TWS earbuds. By resetting them, you can resolve various issues and get your earbuds charging properly again. JBL TUNE 120TWS Not Pairing If users are facing issues with their JBL TUNE 120 TWS earbuds not pairing, whether it’s not connecting with a laptop, iPhone, or Android device, it means they are experiencing pairing issues and want to fix them.  One way to address this is by resetting your earbuds. Resetting them can often fix the not pairing issues you’re facing and then you will be able to pair JBL TUNE 120 TWS earbuds. JBL TUNE 120TWS One Side Not Working Issue Users often encounter a situation where one earbud is working fine, but the other one is not. For instance, if the right earbud produces sound while the left one doesn’t, or vice versa, you may be facing a one-sided not working issue.  If you’re experiencing this problem, there are different ways to fix it and I have written a complete article on how to fix JBL TUNE 120TWS one side not working.  From many solutions, one approach is to reset your earbuds.  Factory Reset JBL TUNE 120TWS If you want to factory reset your earbuds, follow these steps: Place your JBL TUNE 120 TWS earbuds in the charging case. Press and hold the button on the right earbud for at least 5 seconds. Notice that its light will turn on, then off, and then on again. When the light comes back on after the second off cycle, it means your earbud has been reset. This is a simple way to reset your JBL TUNE 120 TWS earbuds. Read Here: How To Reset JBL TUNE 220TWS Soft Reset JBL TUNE 120TWS If you want to perform a soft reset on your JBL TUNE 120 TWS earbuds, follow these steps: Take your earbuds out of the charging case. Press and hold both earbud buttons for at least 10 seconds. Keep an eye on the LED indicator; when it starts blinking, release your fingers. After that, power on your earbuds. By following these steps, your earbuds should undergo a soft reset. Compare: JBL Tune 120 tws vs Airpods Compare: JBL Tune 120 tws vs JBL Tune 220 tws Compare: JBL Tune 120 TWS vs JBL Tune 125 TWS Conclusion Resetting your JBL TUNE 120TWS earbuds can effectively resolve a variety of common issues, from charging and pairing problems to one-sided audio malfunctions.  By following the step-by-step instructions provided for both factory and soft resets, you can quickly restore your earbuds to their optimal performance.  With this guide, you’ll be able to enjoy the full benefits of your JBL TUNE 120TWS True Wireless In-Ear Headphones once again, ensuring an uninterrupted and high-quality listening experience. Aneeq Aish ChoudharyAneeq Aish takes immense pride in being a dedicated researcher, committed to helping individuals like you make well-informed and decisive choices before purchasing or fixing any sound-related equipment like headphones & speakers. decisivesound.com

How To Fix JBL TUNE 120TWS Not Charging Issue

How To Fix JBL TUNE 120TWS Not Charging Issue

Struggling with charging issues on your JBL TUNE 120TWS earbuds can be incredibly frustrating, leaving you without your go-to audio device when you need it most.  In this comprehensive guide, we delve into the step-by-step processes to properly charge your earbuds, explore common charging problems, and provide practical solutions to fix these issues.  Whether your earbuds are not charging at all, one side isn’t working, or your charging case itself is malfunctioning, we’ve compiled detailed instructions to help you troubleshoot and resolve these problems effectively.  Keep reading to ensure your JBL TUNE 120TWS earbuds are always ready to deliver the exceptional sound quality you expect. How to Charge JBL Tune 120TWS First, when you unbox your JBL TUNE 120 TWS earbuds, you will see a few items inside: a charging cable, a charging case, and JBL TUNE 120 TWS earbuds. If you want to charge your earbud, follow these steps: Place your JBL TUNE 120 TWS earbuds into the charging case. There is a charging port on the charging case. Plug one end of the charging cable into the charging port. Connect the other end of the charging cable to an Android or iPhone adapter. Plug the adapter into a switch and turn it on. When your JBL TUNE 120 TWS earbuds start charging, a light on the earbud will turn on, indicating that it is charging.  Leave the earbuds on charge, and they will begin to charge. Battery Timing & Charging Life Of JBL Tune 120TWS Many people ask about the battery timing and charging life of JBL TUNE 120 TWS earbuds. Let me explain the battery timing to you. For a full charge, it takes at least 2 to 3 hours.  JBL TUNE 120 TWS earbuds come with a fast charging feature, which means that if you charge them for 15 minutes, you get 1 hour of playtime. In other words, you can charge them for 15 minutes and then you can pair BL TUNE 120 TWS earbuds and use them for 1 hour.  The maximum charging life is 16 hours. You can use them as wireless earbuds for up to 4 hours, and you can use them for up to 12 hours by keeping them in the charging case. A total of 16 hours of battery timing is enough to last you more than half a day with the JBL TUNE 120 TWS earbuds. Compare: JBL Tune 120 TWS vs JBL Tune 125 TWS Common JBL TUNE 120TWS Charging Related Problems Many users face various types of charging errors when they try to charge their JBL TUNE 120 TWS earbuds. I will explain these charging errors and then guide you on how to fix JBL TUNE 120TWS not charging issue Right JBL TUNE 120TWS  Earbud Not Charging Many users notice that when they put their earbuds on charge, the right JBL TUNE 120 TWS earbud does not charge while the left earbud charges properly. As a result, they cannot listen to music through the right earbud, and it doesn’t provide any playtime because it isn’t charging. Left JBL TUNE 120TWS  Earbud Not Charging Some users also notice that when they put their JBL TUNE 120 TWS earbuds on charge, the left JBL TUNE 120 TWS earbud does not charge while the right earbud charges properly.  As a result, they cannot listen to music through the left earbud, and it doesn’t provide any playtime because it isn’t charging. Due to this you can also face JBL TUNE 120 TWS earbud one side not working. JBL TUNE 120TWS Case Not Charging Many users also notice that their JBL TUNE 120 TWS earbuds’ charging case is not charging. If the case does not charge, they cannot charge their earbuds either. This is a common problem that many users face when their case fails to charge. Read Here: Fix JBL TUNE 220TWS Not Charging Issue Fix JBL TUNE 120TWS Not Charging Issue After discussing the charging-related errors, I want to tell you how to fix them. Below are different methods that can help resolve your JBL TUNE 120 TWS earbuds not charging issue. Please read and implement these methods carefully: Pull Out The Connectors in The case When you look inside your JBL TUNE 120 TWS earbuds charging case, you will see three connectors. These connectors connect with your earbuds and start the charging process.  Sometimes, when you place your earbuds in the charging case, the connectors can get stuck, preventing proper up and down movement. This can cause the connection between the case connectors and the earbud connectors to fail, and as a result, your JBL TUNE 120 TWS earbuds do not charge. I suggest taking a pin and gently lifting the connectors inside the charging case upwards. Once they are lifted, move them up and down 2 to 3 times to ensure they are moving freely and can establish a stable connection.  When you feel that the connectors are correctly aligned and moving properly, place the earbuds back in the charging case and start charging them. Hopefully, this will resolve JBL TUNE 120 TWS earbuds not charging issue and your earbuds will begin to charge. Clean The Connectors Sometimes, the connecting points on your earbuds and the connectors in the charging case get dirty due to earwax or dust. This dirt can prevent a proper connection, stopping the JBL TUNE 120 TWS earbuds from charging.  Clean them effectively by taking a cloth and thoroughly cleaning the connectors and earbuds.  Then, take a cotton swab and dip it in alcohol.  Use the alcohol-dipped cotton swab to clean the connectors and the earbuds thoroughly.  After cleaning with alcohol, take a cloth and dry the connectors and earbuds.  Try charging your earbuds again. Hopefully, they will start charging now. Reset Your Buds One way to fix charging-related errors is by resetting your earbuds. Resetting them can resolve unknown issues that may be causing the error, restoring your earbuds to their default settings and allowing them to be charged again.  There are … Read more

How To Fix JBL  Tune 750 BTNC Not Charging Issue

How To Fix JBL  Tune 750 BTNC Not Charging Issue

The JBL Tune 750 BTNC headphones are known for their impressive sound quality and noise-canceling features. However, like any electronic device, they can encounter charging issues.  In this article, we will guide you on how to properly charge your JBL Tune 750 BTNC headphones, explain the expected battery life, and identify signs of low battery.  Additionally, we will cover common charging errors, such as incomplete charging and sudden battery drainage, and provide practical solutions to fix these issues.  By following these steps, you can ensure your headphones remain charged and ready for use. How To Charge JBL  Tune 750 BTNC Let me tell you how to charge your JBL Tune 750 BTNC headphones. If you want to charge your JBL headphones, look inside the box.  Usually, there is a USB cable that comes with the JBL Tune 750 BTNC headphones. Take out that cable; it has two ends.  One end is meant to connect to your JBL Tune 750 BTNC headphones, and the other end is to connect to your Android or iPhone adapter.  Connect that adapter to a power plug, and charging will start. The end that goes into the charging port should be connected to the USB port on the right ear cup of your JBL Tune 750 BTNC headphones.  Once the other end is connected to the adapter, you will be able to charge your headphones. If you want to check, there is a light next to the USB port that will turn red, indicating that your JBL Tune 750 BTNC headphones are charging. How Long Charge Stay in JBL Tune 750 BTNC If you want to know how long your JBL Tune 750 BTNC headphones will work after one charge, you first need to fully charge them. Typically, it takes at least 2 hours to fully charge.  Connect your headphones to the charger for 2 hours, and then start using them. After a full 2-hour charge, the battery will last for almost 15 hours. This means you can use your headphones for 15 hours before the battery dies.  After 15 hours, you will need to charge them again. Signs That Shows JBL Tune 750 BTNC Battery Low If you want to check if your battery is low, the best way is to look at the light on your headphones. If it is blinking red, turning on and off intermittently, it means your battery level is low, and you need to charge your headphones. Read Here: How to Pair JBL Tune 750 BTNC: Fix Connection Issue Common JBL  Tune 750 BTNC Charging Related Error Many users report various charging errors related to their JBL Tune 750 BTNC headphones. Here, we will mention some common charging errors you might face and provide the best ways to fix them. JBL  TUNE 750 BTNC Not Fully Charging The first issue you might notice with your headphones is that they don’t charge properly. You may see that your headphones stop charging at 30 percent, and the charging level doesn’t increase beyond that.  The battery gets stuck at 30 percent and your headphones are unable to recharge. This is a common error that many JBL Tune 750 BTNC users report. Sudden Battery Drainage Additionally, many users report that after charging their headphones for 2 hours and starting to use them, the battery suddenly dies instead of lasting for 15 hours. Their headphones power off abruptly due to the battery running out. This indicates that there is some error in the battery, causing it to drain suddenly. Fix JBL  Tune 750 BTNC Not Charging Issue Follow our given steps to fix common JBL Tune 750 BTNC charging errors. Read each step carefully and attempt them with care. Hopefully, after this, you will be able to fix the charging-related errors. Repair The Usb-Port  As we mentioned, there is a USB port on the headphones where you plug in the USB cable for charging. This port plays a crucial role in charging. Sometimes, while plugging in or removing the USB cable, the USB port can get damaged, which can prevent your headphones from charging properly.  Try to fix the USB port yourself or seek help from a USB technician. Once you repair the USB port, a stable connection between the USB port and the USB cable will be established, and your headphones will start charging properly. You will no longer face charging issues. Use Another USB Cable If you are charging using one cable, I suggest you try using another USB cable before taking any other steps. It is possible that your old cable is damaged, which is why your headphones are not charging.  Try using a different cable. Connect this cable to your JBL Tune 750 BTNC headphones and your charger adapter, and attempt to charge your headphones. Hopefully, using a new or different cable will start charging your headphones, and you won’t need to take any further steps. Compare: Jbl Live 660NC vs Jbl Tune 750BTNC Use and Recharge Many users report that when they try to charge their JBL Tune 750 BTNC headphones, the headphones don’t charge. However, they keep trying to charge their headphones. When the battery dies automatically during usage, they start charging their headphones again.  What I suggest is to fully discharge the battery first. Use the headphones until the battery goes to zero. Once it reaches zero, start recharging them. Hopefully, by doing this, your headphones will start charging properly, and you won’t face charging errors. Reset JBL Tune 750 BTNC Headphones Resetting your JBL Tune 750 BTNC headphones can indeed resolve various charging-related issues, including “not charging” problems. There are different ways to reset headphones, and we have written an article specifically on how to reset JBL Tune 750 BTNC.  You can read our article to learn how to reset your headphones and potentially fix the charging issues you’re facing. Read Here: Fix JBL Endurance Peak Not Charging Replace If Warranty Available If you’ve followed all the given steps and are still facing charging-related issues, I … Read more

How to Reset JBL Tune 750 BTNC

How to Reset JBL Tune 750 BTNC

If you’re experiencing issues with your JBL Tune 750 BTNC headphones, such as pairing problems, charging difficulties, or sound imbalances, a reset might be the solution you need.  In this article, we cover various methods to reset your JBL Tune 750 BTNC headphones, including a hard reset, soft reset, instant factory reset, and resetting the Bluetooth connection.  We’ll guide you through each step to help restore your headphones to their optimal performance. Explore: JBL Tune 750 BTNC Review Errors That Can Be Fixed By Resetting JBL Tune 750btnc JBL 750 BTNC Not Showing to Pair This is an error where your JBL Tune 750btnc headphones don’t appear on the available devices list when you try to connect them to a device.  You can turn on Bluetooth and search for devices, but your headphones’ name won’t show up there. This prevents you from connecting your headphones to that device. If you’re facing such an issue, you can fix it by performing a simple reset & then you can easily Pair JBL Tune 750 BTNC. JBL 750 BTNC Not Charging Issue Besides that, some users also face a situation where their JBL Tune 750btnc headphones are not charging. They try serious methods to charge their headphones, but they still see that their headphones are not charging, and the battery is almost dead.  The headphones don’t turn on. If you’re facing JBL  Tune 750 BTNC Not Charging Issue, I suggest performing a hard reset on your headphones. This action might fix your charging issues. JBL 750 BTNC One Side Left Or Right Not Working Some users suggest that one side of their JBL Tune 750btnc headphones is not working properly.  Either they hear sound only from the left headphone and not from the right one, or vice versa. When sound is coming from the right JBL Tune 750btnc headphone, it doesn’t come from the left one.  To fix JBL 750 BTNC one side left or right earbud not working error, there are different methods described in detail in the article. However, one effective method is to reset the JBL Tune 750btnc headphones. By following our provided steps, you can reset them and potentially fix this issue. Hard Reset JBL Tune 750btnc Sure, here are the steps to hard reset your headphone: Make sure your JBL Tune 750btnc headphone is disconnected from any paired device. Power off your headphone by pressing the power button. After turning it off, press and hold the power button again to turn it on. While it’s turning on, simultaneously press and hold the volume up and volume down buttons for about 10 seconds. Release the buttons after holding them for 10 seconds. Your headphone should now be hard reset, and it should revert to its default settings, deleting any saved data. Read Here: How to Reset JBL Endurance Peak Soft Reset JBL Tune 750btnc If you want to perform a soft reset on your JBL Tune 750btnc headphone, you can do so with just one simple step. A soft reset is similar to a power cycle and doesn’t delete your saved data.  Follow the steps below to perform a soft reset on your headphone: Disconnect your JBL Tune 750btnc headphone from any paired device. Press the power button to turn your headphones on. Wait for about 10 seconds. After 10 seconds, press the power button again to turn it off. Congratulations, your JBL Tune 750btnc headphone has now undergone a soft reset. Instant Factory Reset JBL Tune 750btnc You can perform an instant factory reset on your JBL Tune 750btnc headphone by following these steps: Connect your headphone to the charging cable. Once connected to charging, your headphone will automatically turn off. Disconnect it from charging and turn it back on immediately. As soon as it turns on, press and hold the volume up and volume down buttons simultaneously for 10 seconds. After 10 seconds, release the buttons. Your headphone will now undergo an instant factory reset. Performing this instant factory reset should fix various errors you may be facing and prevent them from occurring again in the future. How to Reset Bluetooth on JBL Tune 750BTNC You can also reset your JBL Tune 750btnc Bluetooth connection to refresh the connection and troubleshoot any pairing issues. Here are the steps to reset JBL Tune 750btnc Bluetooth connection: Ensure your headphones are turned on. Press and hold the Bluetooth button for at least 5 seconds until the LED indicator above Bluetooth starts flashing red. Release the button after the red light starts flashing. Power off your headphones and then power them back on. By following these steps, your Bluetooth connection will reset along with your headphones. After the reset, you should be able to connect them to various devices without any issues. Compare JBL Tune 750BTNC Jbl Live 650BTNC vs Jbl Tune 750BTNC Jbl Live 660NC vs Jbl Tune 750BTNC Jbl Tune 600BTNC vs 750BTNC Headphones Conclusion Resetting your JBL Tune 750 BTNC headphones can resolve several common issues, from pairing problems to charging and sound imbalances.  By following the steps outlined in this article, you can perform a hard reset, soft reset, instant factory reset, or Bluetooth reset, helping to restore your headphones to their original functionality.  Whether you’re dealing with connectivity issues or performance glitches, these reset methods offer a simple and effective solution to get your headphones back in working order. Aneeq Aish ChoudharyAneeq Aish takes immense pride in being a dedicated researcher, committed to helping individuals like you make well-informed and decisive choices before purchasing or fixing any sound-related equipment like headphones & speakers. decisivesound.com

How to Pair JBL Tune 750 BTNC: Fix Connection Issue

How to Pair JBL Tune 750 BTNC

In this article, we have covered everything you need to know about pairing your JBL Tune 750 BTNC headphones with various devices.  We will start by explaining how to put your headphones into pairing mode, followed by detailed steps for connecting them to Android devices, iPhones, and laptops.  Additionally, we will address common connection problems and provide solutions to ensure a smooth and hassle-free experience. Whether you’re a new user or looking to troubleshoot, this guide will help you get the most out of your JBL Tune 750 BTNC headphones. Put JBL Tune 750 BTNC In Pairing Mode If you want to pair your JBL Tune 750 btnc headphones with a device, it’s very important to first put them into pairing mode. Until you put them into pairing mode, your headphones won’t be discoverable and can’t be connected to any device.  So, if you want to connect your JBL Tune 750 btnc headphones to a device, start by putting them into pairing mode. To put your JBL Tune 750 btnc headphones into pairing mode, follow these steps: Turn on your JBL Tune 750 btnc headphones. Press and hold the Bluetooth button on your headphones. You will see an LED light start to flash. When the LED light starts flashing, it means your headphones are now in pairing mode.  Now, you can connect them to your device. For detailed instructions on how to connect your headphones to your device, please keep reading our article. Pair JBL Tune 750 btnc To Android Now that your JBL Tune 750 btnc headphones are in pairing mode, if you want to connect them to your Android device, follow our given steps: First, turn on Bluetooth on your Android device. Go to the Settings on your Android device. Click on the Bluetooth option. There will be a button inside the Bluetooth settings. Toggle this button to turn on Bluetooth. Your Android device will start searching for available devices. Check the list of available devices for the name of your JBL Tune 750 btnc headphones.  Once you find it, click on the name to connect your device to your headphones. Now, your headphones are connected to your Android device. Pair JBL Tune 750 btnc To Iphone If you are an iPhone user and want to connect your JBL Tune 750 btnc headphones to your iPhone, first make sure that your headphones are in pairing mode. After putting them in pairing mode, turn on Bluetooth on your iPhone by following these steps: Go to the Settings on your iPhone. Tap on the Bluetooth option. Turn on Bluetooth by toggling the switch. Once Bluetooth is enabled, your iPhone will start searching for available devices. Your headphones’ name should appear in the list of available devices.  Ensure that your headphones and iPhone are within range. Then, click on the name of your headphones to connect them to your iPhone. Now, your JBL Tune 750 btnc headphones are connected to your iPhone. Compare: Jbl Tune 600BTNC vs JBL Tune 750BTNC Pair JBL Tune 750 btnc To Laptop Similarly, if you want to connect your JBL Tune 750 btnc headphones to your laptop, first ensure that your headphones are in pairing mode. Then, follow these steps to enable Bluetooth on your laptop and search for available devices: Click on the Start icon at the bottom left of your laptop screen. Go to Settings. In the Settings menu, click on Devices. You will see the Bluetooth option. Turn it on. Once Bluetooth is enabled, your laptop will start searching for available devices. The name of your JBL Tune 750 btnc headphones should appear in the list of available devices. Click on the name of your headphones to connect them to your laptop. Now, your headphones are connected to your laptop. Common  JBL Tune 750 btnc Connection Problems If you are trying to connect your JBL Tune 750 btnc headphones to a device, you might encounter different errors.  I am going to tell you what types of errors you might face and then explain the steps you need to take to fix these errors. JBL Tune 750btnc Not Connecting to Bluetooth When connecting your JBL Tune 750 btnc headphones to a device, one common error you might face is that your headphones do not connect via Bluetooth.  You might turn on your phone and press the Bluetooth button, but it does not connect.  Additionally, the Bluetooth indicator LED lights on your headphones might not flash. This means that your headphones are not able to connect to the device.  If your headphones do not connect via Bluetooth, you will not be able to connect them to any other device either. This is a common error you might encounter during the connection process. JBL 750 BTNC Not Showing to Pair Another error you might face is that while your headphones might connect via Bluetooth, the name of your headphones might not appear in the list of available devices on the device you want to connect to.  If your headphones do not show up, you won’t be able to connect them to your device. One reason for this issue could be that your Bluetooth headphones are out of range. This is a potential error you might encounter during the connection process. Read Here: How To Fix JBL  Tune 750 BTNC Not Charging Issue Fix Common  JBL Tune 750 btnc Connection Problems You can follow our given steps to fix the common problems mentioned above. Follow our steps: Keep in Range If your JBL Tune 750 btnc headphones are not showing up for pairing, one possible reason could be that your headphones are not within the range of the device you want to connect to.  Try keeping your headphones within range of the device to ensure they start showing up for pairing. If they are not within range, they will not show up. Therefore, keeping them within range is the best way to fix this error. Forget Device and Repair Another way to fix your headphones if … Read more

How to Reset JBL Endurance Peak 2

How to Reset JBL Endurance Peak 2

Resetting your JBL Endurance Peak 2 earbuds can resolve a variety of issues and restore them to their default settings.  This article covers common errors that can be fixed by resetting, such as connectivity problems, charging issues, and the need for a PIN during pairing.  We’ll provide detailed instructions for both soft and hard reset JBL Endurance Peak 2 to help you troubleshoot and resolve these problems. Error That Can Be Fixed After Resetting JBL Endurance Peak 2 Different people might reset their JBL Endurance Peak 2 earbuds for different reasons. Some might reset them to bring them to their default settings, while others might do it to fix any errors they’re experiencing.  I can tell you some common errors you might encounter that can be fixed by resetting the JBL Endurance Peak 2 earbuds.  If you face any of these errors, just reset your earbuds, and they should be good to go. JBL Endurance Peak 2 Right Earbud Won’t Connect It seems like most of the people are complaining that when they connect their earbuds to a device, the JBL Endurance Peak 2 right earbud doesn’t connect properly. Only the left earbud connects, resulting in no sound from the right earbud.  If you’re facing this error too, we suggest following our provided steps to reset your earbuds. After resetting, you shouldn’t encounter this type of error, and you will be able to pair jbl endurance peak 2. PIN Required For Pairing With Device Most people are also bothered by the fact that when they connect their earbuds to a device, they need to enter a PIN, such as 0000, 1111, or 1234.  Even when they enter the correct PIN, they still encounter issues with the PIN, and the problem persists.  We suggest that you reset your earbuds and try reconnecting them. Hopefully, after resetting, you won’t need to enter a PIN, and you can easily connect them to your device. JBL Endurance Peak 2 Not Charging In addition to these, are you also facing the issue that your JBL Endurance Peak 2 earbuds aren’t charging? In this case, you can also try resetting your earbuds to address the charging issues.  Resetting is not the only option available, but it’s one of the methods through which you can fix JBL Endurance Peak 2 not charging issues. If you want to know about other methods, you can read our article on How To Fix JBL Endurance Peak 2 not charging issue.  JBL Endurance Peak 2 Left Earbud Not Working In addition to these issues, some users are experiencing a problem where their JBL Endurance Peak 2 left earbud suddenly stops working or functions intermittently. This issue of the left earbud not working is a common error.  If you want to fix this error, there’s an improved version of addressing it. One method is to reset your earbuds. After resetting, you can easily fix the issues with the left earbud not working. JBL Endurance Peak 2 Right Earbud Not Working Some users are experiencing a problem where their right earbud suddenly stops working or functions intermittently.  This issue of the right earbud not working is a common error. If you want to fix this error, there’s an improved version of addressing it. One method is to reset your JBL Endurance Peak 2 earbuds. After resetting, you can easily fix the issues with the right earbud not working. Steps To Soft Reset JBL Endurance Peak 2 To reset your earbuds, there are 2-3 methods, including a soft reset and a hard reset. Let me explain the soft reset first. It’s an easy and effective way to reset your earbuds without losing any data. Here’s how you can do it: Place your JBL Endurance Peak 2 earbuds in the charging case. Wait for a few moments. After a while, take your earbuds out of the charging case. Put JBL Endurance Peak 2 back into pairing mode. Congratulations! Your earbuds have been soft reset. This method is quick and should help resolve any minor issues you might be experiencing with your earbuds. Steps To Hard Reset JBL Endurance Peak 2 After the soft reset, let me explain the hard reset. But before I do, it’s important to note that performing a hard reset may result in the loss of saved data on your earbuds. Therefore, you should only proceed with a hard reset if you have no other option left. Here’s how you can perform a hard reset: Ensure your earbuds are disconnected from any connected devices. Turn off your earbuds. Place your earbuds back into the charging case. Click the JBL loop button on the charging case 2-3 times and hold it for about twenty seconds. Hold it until the red light comes on. Afterward, take your earbuds out of the case and power them on. Following these steps should perform a hard reset on your earbuds. Read Here: How to Reset Jbl Endurance Peak By Decisivesound. Compare JBL Endurance Peak 2 With Other Endurance Peak 2 vs Push Active Powerbeats Pro vs Endurance Peak 2 Endurance Peak 2 vs 3 Conclusion Resetting your JBL Endurance Peak 2 earbuds is an effective solution for various issues, including connectivity problems, PIN requirements, charging failures, and malfunctioning earbuds.  By following the steps for a soft reset or, if necessary, a hard reset, you can restore your earbuds to optimal functionality.  Whether you’re facing minor glitches or more persistent errors, resetting your earbuds can often resolve these issues, allowing you to enjoy uninterrupted audio performance. Aneeq Aish ChoudharyAneeq Aish takes immense pride in being a dedicated researcher, committed to helping individuals like you make well-informed and decisive choices before purchasing or fixing any sound-related equipment like headphones & speakers. decisivesound.com