How to Pair JBL Tune 750 BTNC: Fix Connection Issue

How to Pair JBL Tune 750 BTNC

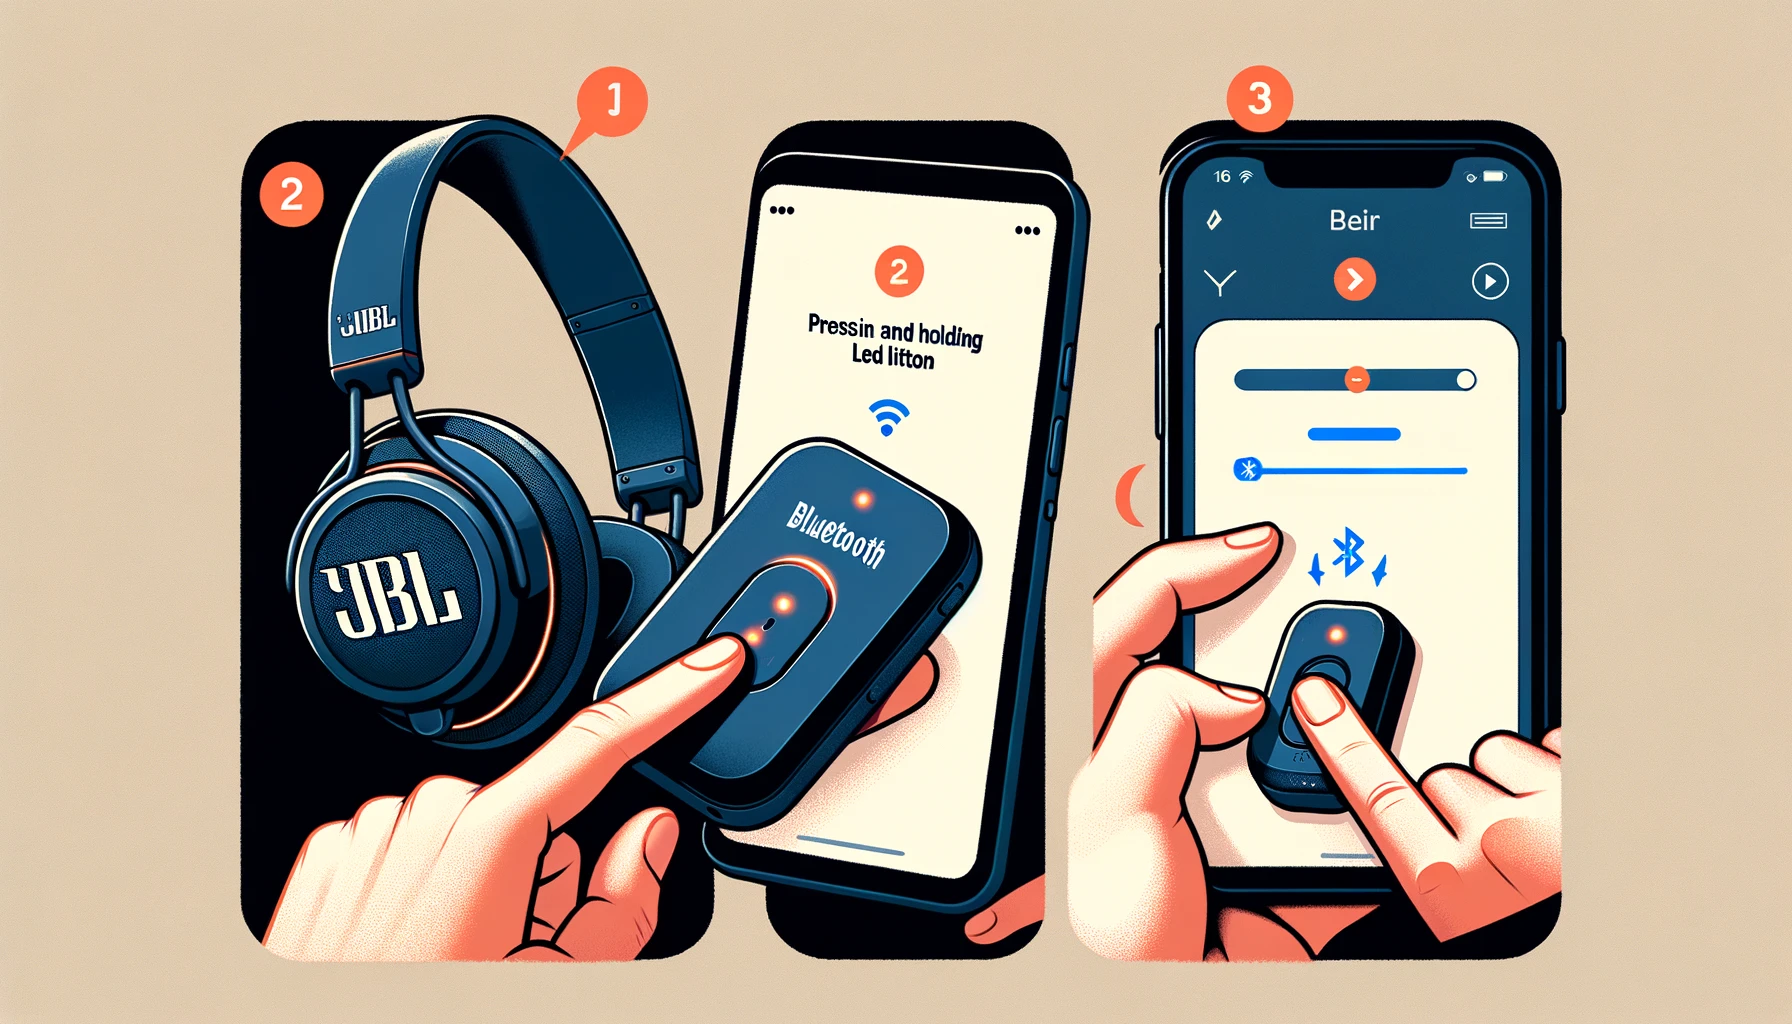
In this article, we have covered everything you need to know about pairing your JBL Tune 750 BTNC headphones with various devices.  We will start by explaining how to put your headphones into pairing mode, followed by detailed steps for connecting them to Android devices, iPhones, and laptops.  Additionally, we will address common connection problems and provide solutions to ensure a smooth and hassle-free experience. Whether you’re a new user or looking to troubleshoot, this guide will help you get the most out of your JBL Tune 750 BTNC headphones. Put JBL Tune 750 BTNC In Pairing Mode If you want to pair your JBL Tune 750 btnc headphones with a device, it’s very important to first put them into pairing mode. Until you put them into pairing mode, your headphones won’t be discoverable and can’t be connected to any device.  So, if you want to connect your JBL Tune 750 btnc headphones to a device, start by putting them into pairing mode. To put your JBL Tune 750 btnc headphones into pairing mode, follow these steps: Turn on your JBL Tune 750 btnc headphones. Press and hold the Bluetooth button on your headphones. You will see an LED light start to flash. When the LED light starts flashing, it means your headphones are now in pairing mode.  Now, you can connect them to your device. For detailed instructions on how to connect your headphones to your device, please keep reading our article. Pair JBL Tune 750 btnc To Android Now that your JBL Tune 750 btnc headphones are in pairing mode, if you want to connect them to your Android device, follow our given steps: First, turn on Bluetooth on your Android device. Go to the Settings on your Android device. Click on the Bluetooth option. There will be a button inside the Bluetooth settings. Toggle this button to turn on Bluetooth. Your Android device will start searching for available devices. Check the list of available devices for the name of your JBL Tune 750 btnc headphones.  Once you find it, click on the name to connect your device to your headphones. Now, your headphones are connected to your Android device. Pair JBL Tune 750 btnc To Iphone If you are an iPhone user and want to connect your JBL Tune 750 btnc headphones to your iPhone, first make sure that your headphones are in pairing mode. After putting them in pairing mode, turn on Bluetooth on your iPhone by following these steps: Go to the Settings on your iPhone. Tap on the Bluetooth option. Turn on Bluetooth by toggling the switch. Once Bluetooth is enabled, your iPhone will start searching for available devices. Your headphones’ name should appear in the list of available devices.  Ensure that your headphones and iPhone are within range. Then, click on the name of your headphones to connect them to your iPhone. Now, your JBL Tune 750 btnc headphones are connected to your iPhone. Compare: Jbl Tune 600BTNC vs JBL Tune 750BTNC Pair JBL Tune 750 btnc To Laptop Similarly, if you want to connect your JBL Tune 750 btnc headphones to your laptop, first ensure that your headphones are in pairing mode. Then, follow these steps to enable Bluetooth on your laptop and search for available devices: Click on the Start icon at the bottom left of your laptop screen. Go to Settings. In the Settings menu, click on Devices. You will see the Bluetooth option. Turn it on. Once Bluetooth is enabled, your laptop will start searching for available devices. The name of your JBL Tune 750 btnc headphones should appear in the list of available devices. Click on the name of your headphones to connect them to your laptop. Now, your headphones are connected to your laptop. Common  JBL Tune 750 btnc Connection Problems If you are trying to connect your JBL Tune 750 btnc headphones to a device, you might encounter different errors.  I am going to tell you what types of errors you might face and then explain the steps you need to take to fix these errors. JBL Tune 750btnc Not Connecting to Bluetooth When connecting your JBL Tune 750 btnc headphones to a device, one common error you might face is that your headphones do not connect via Bluetooth.  You might turn on your phone and press the Bluetooth button, but it does not connect.  Additionally, the Bluetooth indicator LED lights on your headphones might not flash. This means that your headphones are not able to connect to the device.  If your headphones do not connect via Bluetooth, you will not be able to connect them to any other device either. This is a common error you might encounter during the connection process. JBL 750 BTNC Not Showing to Pair Another error you might face is that while your headphones might connect via Bluetooth, the name of your headphones might not appear in the list of available devices on the device you want to connect to.  If your headphones do not show up, you won’t be able to connect them to your device. One reason for this issue could be that your Bluetooth headphones are out of range. This is a potential error you might encounter during the connection process. Read Here: How To Fix JBL  Tune 750 BTNC Not Charging Issue Fix Common  JBL Tune 750 btnc Connection Problems You can follow our given steps to fix the common problems mentioned above. Follow our steps: Keep in Range If your JBL Tune 750 btnc headphones are not showing up for pairing, one possible reason could be that your headphones are not within the range of the device you want to connect to.  Try keeping your headphones within range of the device to ensure they start showing up for pairing. If they are not within range, they will not show up. Therefore, keeping them within range is the best way to fix this error. Forget Device and Repair Another way to fix your headphones if … Read more

How to Reset JBL Endurance Peak 2

How to Reset JBL Endurance Peak 2

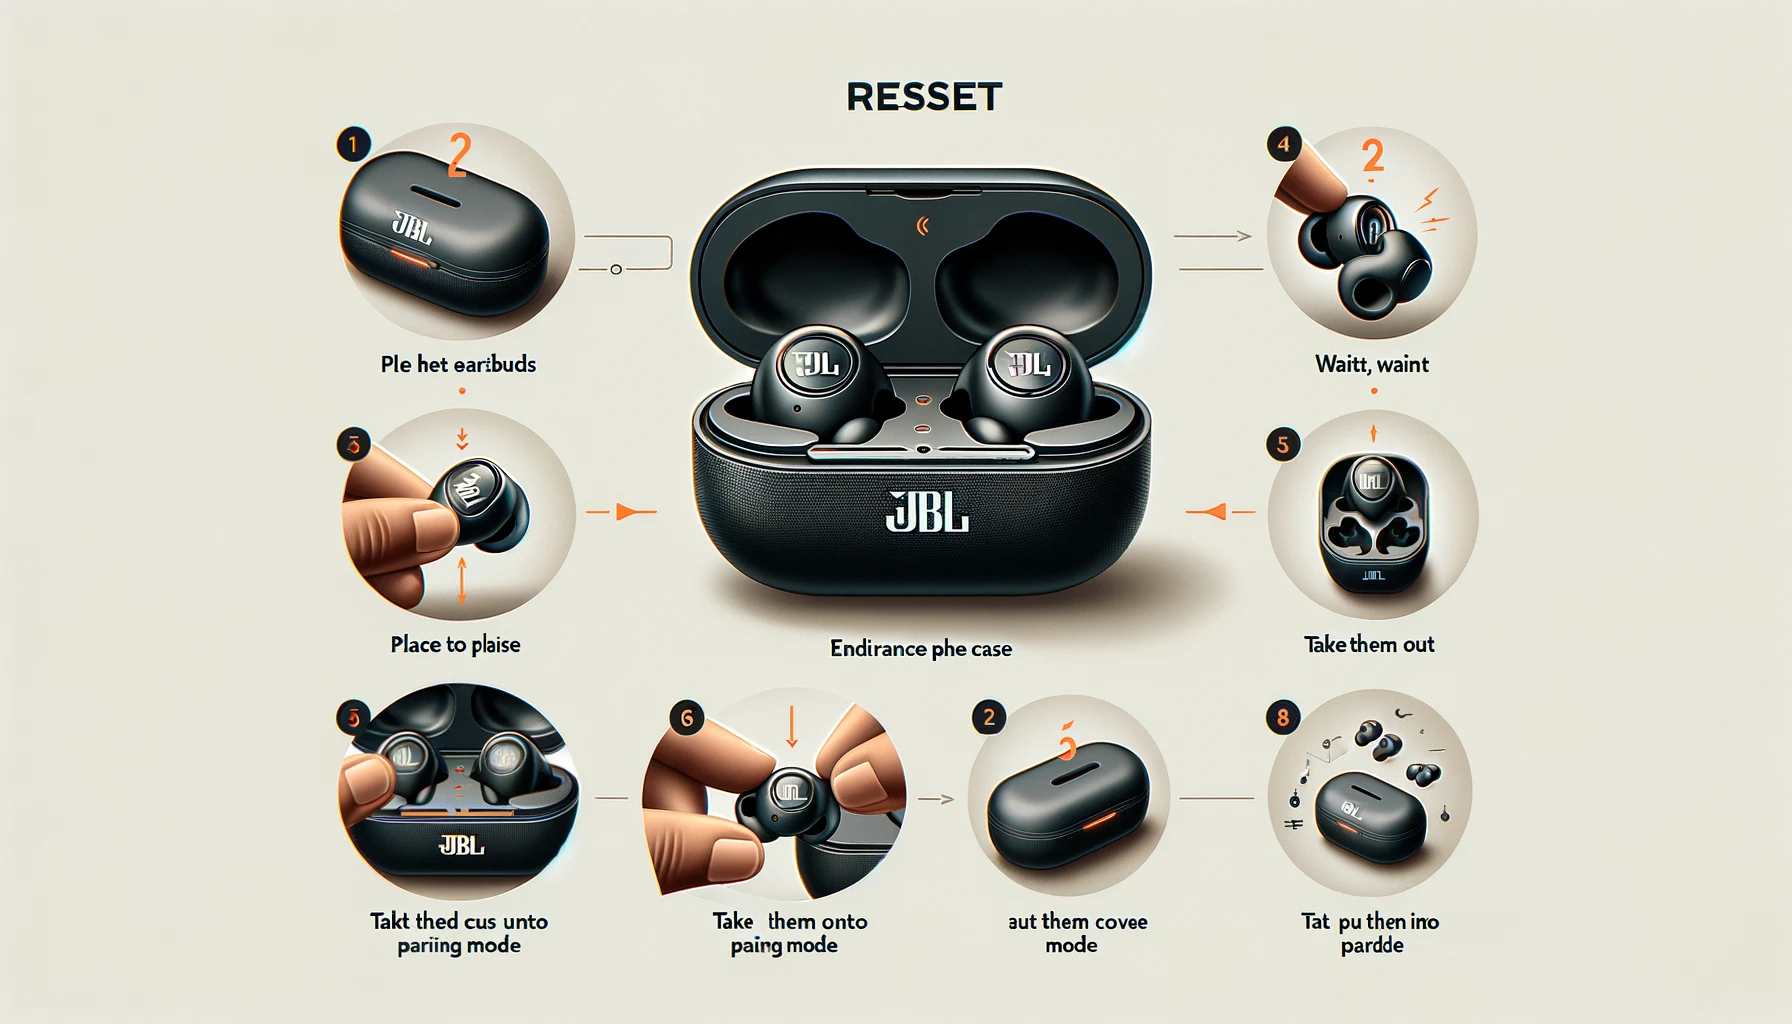
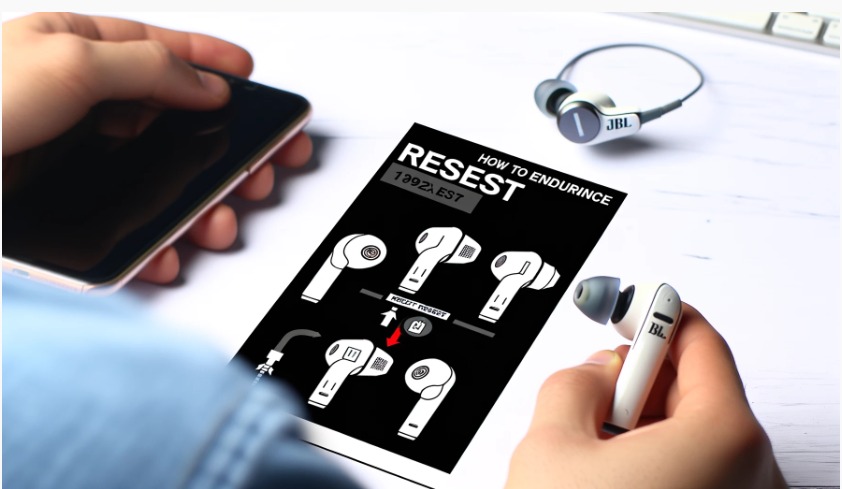
Resetting your JBL Endurance Peak 2 earbuds can resolve a variety of issues and restore them to their default settings.  This article covers common errors that can be fixed by resetting, such as connectivity problems, charging issues, and the need for a PIN during pairing.  We’ll provide detailed instructions for both soft and hard reset JBL Endurance Peak 2 to help you troubleshoot and resolve these problems. Error That Can Be Fixed After Resetting JBL Endurance Peak 2 Different people might reset their JBL Endurance Peak 2 earbuds for different reasons. Some might reset them to bring them to their default settings, while others might do it to fix any errors they’re experiencing.  I can tell you some common errors you might encounter that can be fixed by resetting the JBL Endurance Peak 2 earbuds.  If you face any of these errors, just reset your earbuds, and they should be good to go. JBL Endurance Peak 2 Right Earbud Won’t Connect It seems like most of the people are complaining that when they connect their earbuds to a device, the JBL Endurance Peak 2 right earbud doesn’t connect properly. Only the left earbud connects, resulting in no sound from the right earbud.  If you’re facing this error too, we suggest following our provided steps to reset your earbuds. After resetting, you shouldn’t encounter this type of error, and you will be able to pair jbl endurance peak 2. PIN Required For Pairing With Device Most people are also bothered by the fact that when they connect their earbuds to a device, they need to enter a PIN, such as 0000, 1111, or 1234.  Even when they enter the correct PIN, they still encounter issues with the PIN, and the problem persists.  We suggest that you reset your earbuds and try reconnecting them. Hopefully, after resetting, you won’t need to enter a PIN, and you can easily connect them to your device. JBL Endurance Peak 2 Not Charging In addition to these, are you also facing the issue that your JBL Endurance Peak 2 earbuds aren’t charging? In this case, you can also try resetting your earbuds to address the charging issues.  Resetting is not the only option available, but it’s one of the methods through which you can fix JBL Endurance Peak 2 not charging issues. If you want to know about other methods, you can read our article on How To Fix JBL Endurance Peak 2 not charging issue.  JBL Endurance Peak 2 Left Earbud Not Working In addition to these issues, some users are experiencing a problem where their JBL Endurance Peak 2 left earbud suddenly stops working or functions intermittently. This issue of the left earbud not working is a common error.  If you want to fix this error, there’s an improved version of addressing it. One method is to reset your earbuds. After resetting, you can easily fix the issues with the left earbud not working. JBL Endurance Peak 2 Right Earbud Not Working Some users are experiencing a problem where their right earbud suddenly stops working or functions intermittently.  This issue of the right earbud not working is a common error. If you want to fix this error, there’s an improved version of addressing it. One method is to reset your JBL Endurance Peak 2 earbuds. After resetting, you can easily fix the issues with the right earbud not working. Steps To Soft Reset JBL Endurance Peak 2 To reset your earbuds, there are 2-3 methods, including a soft reset and a hard reset. Let me explain the soft reset first. It’s an easy and effective way to reset your earbuds without losing any data. Here’s how you can do it: Place your JBL Endurance Peak 2 earbuds in the charging case. Wait for a few moments. After a while, take your earbuds out of the charging case. Put JBL Endurance Peak 2 back into pairing mode. Congratulations! Your earbuds have been soft reset. This method is quick and should help resolve any minor issues you might be experiencing with your earbuds. Steps To Hard Reset JBL Endurance Peak 2 After the soft reset, let me explain the hard reset. But before I do, it’s important to note that performing a hard reset may result in the loss of saved data on your earbuds. Therefore, you should only proceed with a hard reset if you have no other option left. Here’s how you can perform a hard reset: Ensure your earbuds are disconnected from any connected devices. Turn off your earbuds. Place your earbuds back into the charging case. Click the JBL loop button on the charging case 2-3 times and hold it for about twenty seconds. Hold it until the red light comes on. Afterward, take your earbuds out of the case and power them on. Following these steps should perform a hard reset on your earbuds. Read Here: How to Reset Jbl Endurance Peak By Decisivesound. Compare JBL Endurance Peak 2 With Other Endurance Peak 2 vs Push Active Powerbeats Pro vs Endurance Peak 2 Endurance Peak 2 vs 3 Conclusion Resetting your JBL Endurance Peak 2 earbuds is an effective solution for various issues, including connectivity problems, PIN requirements, charging failures, and malfunctioning earbuds.  By following the steps for a soft reset or, if necessary, a hard reset, you can restore your earbuds to optimal functionality.  Whether you’re facing minor glitches or more persistent errors, resetting your earbuds can often resolve these issues, allowing you to enjoy uninterrupted audio performance. Aneeq Aish ChoudharyAneeq Aish takes immense pride in being a dedicated researcher, committed to helping individuals like you make well-informed and decisive choices before purchasing or fixing any sound-related equipment like headphones & speakers. decisivesound.com

How to Pair JBL Endurance Peak 2: Fix Errors

How to Pair JBL Endurance Peak 2

In this article, we discuss how to easily pair your JBL Endurance Peak 2 earbuds with various devices and address common connection issues.  We provide step-by-step instructions for putting your earbuds in pairing mode and connecting them to Android devices, iPhones, and laptops.  Additionally, we cover common problems like the right or left earbud not connecting, issues with pairing mode, and how to resolve these errors.  Whether you’re facing difficulties syncing both earbuds or needing to reset them, this guide offers practical solutions to ensure a smooth and successful pairing experience. How To Put JBL Endurance Peak 2 In Pairing Mode It’s essential to put your earbuds in pairing mode because they cannot be paired with any device until they are in this mode. To put them in pairing mode, follow these necessary steps: Place both JBL Endurance Peak 2 earbuds in their respective charging cases. Ensure both earbuds are seated properly in their cases. Close the cases and leave them for about 5 seconds. Open both cases simultaneously and remove the earbuds. Fully extend the ear loops of both earbuds at the same time. Once both earbuds are fully extended, they should enter pairing mode simultaneously. Now, both earbuds should be discoverable and ready to pair. By ensuring both are in pairing mode simultaneously, you should not encounter any connection errors. How to Pair JBL Endurance Peak 2 With Android If you want to connect your JBL Endurance Peak 2 earbuds to an Android device, first ensure that both your earbuds and the Android device have Bluetooth turned on.  If Bluetooth is not turned on, go to the settings, find the Bluetooth option, and click on it to turn it on.  Then, find and select your earbuds from the available options.  After this, your JBL Endurance Peak 2 earbuds should be successfully connected to your android device. How to Pair JBL Endurance Peak 2 With Iphone If you want to connect your JBL Endurance Peak 2 earbuds to an iPhone, first ensure that both the earbuds and the iPhone have Bluetooth turned on.  If Bluetooth is not turned on, go to the settings on your iPhone and click on the Bluetooth option to turn it on.  Then, look for your earbuds in the list of available devices and select them to connect.  By doing this, your earbuds should successfully connect to your iPhone. Learn Here: How to Pair Jbl Endurance Peak By Decisivesound. How to Pair JBL Endurance Peak 2 With Laptop If you want to connect your JBL Endurance Peak 2 earbuds to a laptop, first ensure that your earbuds are in pairing mode.  Then, go to the bottom left corner of your laptop screen and click on the Windows icon.  After that, go to Settings and click on the option for Devices.  Next, click on Bluetooth & other devices.  Turn on Bluetooth if it’s not already on, and find your earbuds in the list of available devices.  Select your JBL Endurance Peak 2 earbuds to connect them to your laptop.  This should ensure your earbuds successfully connect to your laptop. Compare: Beats Powerbeats Pro vs JBL Endurance Peak 2 Common JBL Endurance Peak 2 Connection Problems  Right Earbud Won’t Connect + Asking For Pin Code Sometimes you may also encounter errors such as the JBL Endurance Peak 2 right earbud not connecting when the connection is being established, and you might need to enter a pin code.  If you’re facing such errors, there’s no need to worry. Right and Left Earbuds Not Entering Pairing Mode Simultaneously One common problem with JBL Endurance Peak 2 is that both earbuds do not enter pairing mode at the same time.  Some users complain that the right earbud stays in pairing mode while the left one does not connect, and others say that the left earbud connects while the right one does not. Read Here: JBL Endurance Peak 2 Not Charging: Fix It JBL Endurance Peak 2 Won’t Connect: Fix It SYNC Both Earbuds If you’re having trouble connecting your JBL Endurance Peak 2, I would suggest trying the following steps: Place both JBL Endurance Peak 2 earbuds in their respective charging cases. Ensure both earbuds are seated properly in their cases. Close the cases and leave them for about 5 seconds. Open both cases simultaneously and remove the earbuds. Fully extend the ear loops of both earbuds simultaneously. Remember Simultaneously. Once both earbuds are fully extended, they should enter pairing mode simultaneously. Now, both earbuds should be discoverable and ready to pair. You shouldn’t encounter any connection errors if both are in pairing mode simultaneously. Forget Device If your JBL Endurance Peak 2 earbuds aren’t connecting properly, you should try resetting them.  You can do this by following our provided method:  Put your earbuds in their case and press on the JBL logo three times.  When you hear the connection sound, you’ll know your earbuds are functioning properly. Reset Them  If your earbuds aren’t connecting properly, you can reset them in both soft and hard ways.  We have outlined all the methods for resetting them and related procedures separately in our article on resetting JBL Endurance Peak 2. You can easily reset them by reading that article. Conclusion By following the steps outlined in this guide, you can successfully pair your JBL Endurance Peak 2 earbuds with various devices and troubleshoot common connection issues.  Whether you need to sync both earbuds, reset them, or ensure they enter pairing mode simultaneously, we’ve provided practical solutions to help you overcome these challenges.  With these tips, you can enjoy a seamless and uninterrupted listening experience with your JBL Endurance Peak 2 earbuds. If you continue to encounter problems, consider reaching out to JBL support for further assistance. Compare: JBL Endurance Peak 2 vs Peak 3 Aneeq Aish ChoudharyAneeq Aish takes immense pride in being a dedicated researcher, committed to helping individuals like you make well-informed and decisive choices before purchasing or fixing any sound-related equipment like headphones & speakers. decisivesound.com

JBL Endurance Peak 2 Not Charging: Fix It

JBL Endurance Peak 2 Not Charging

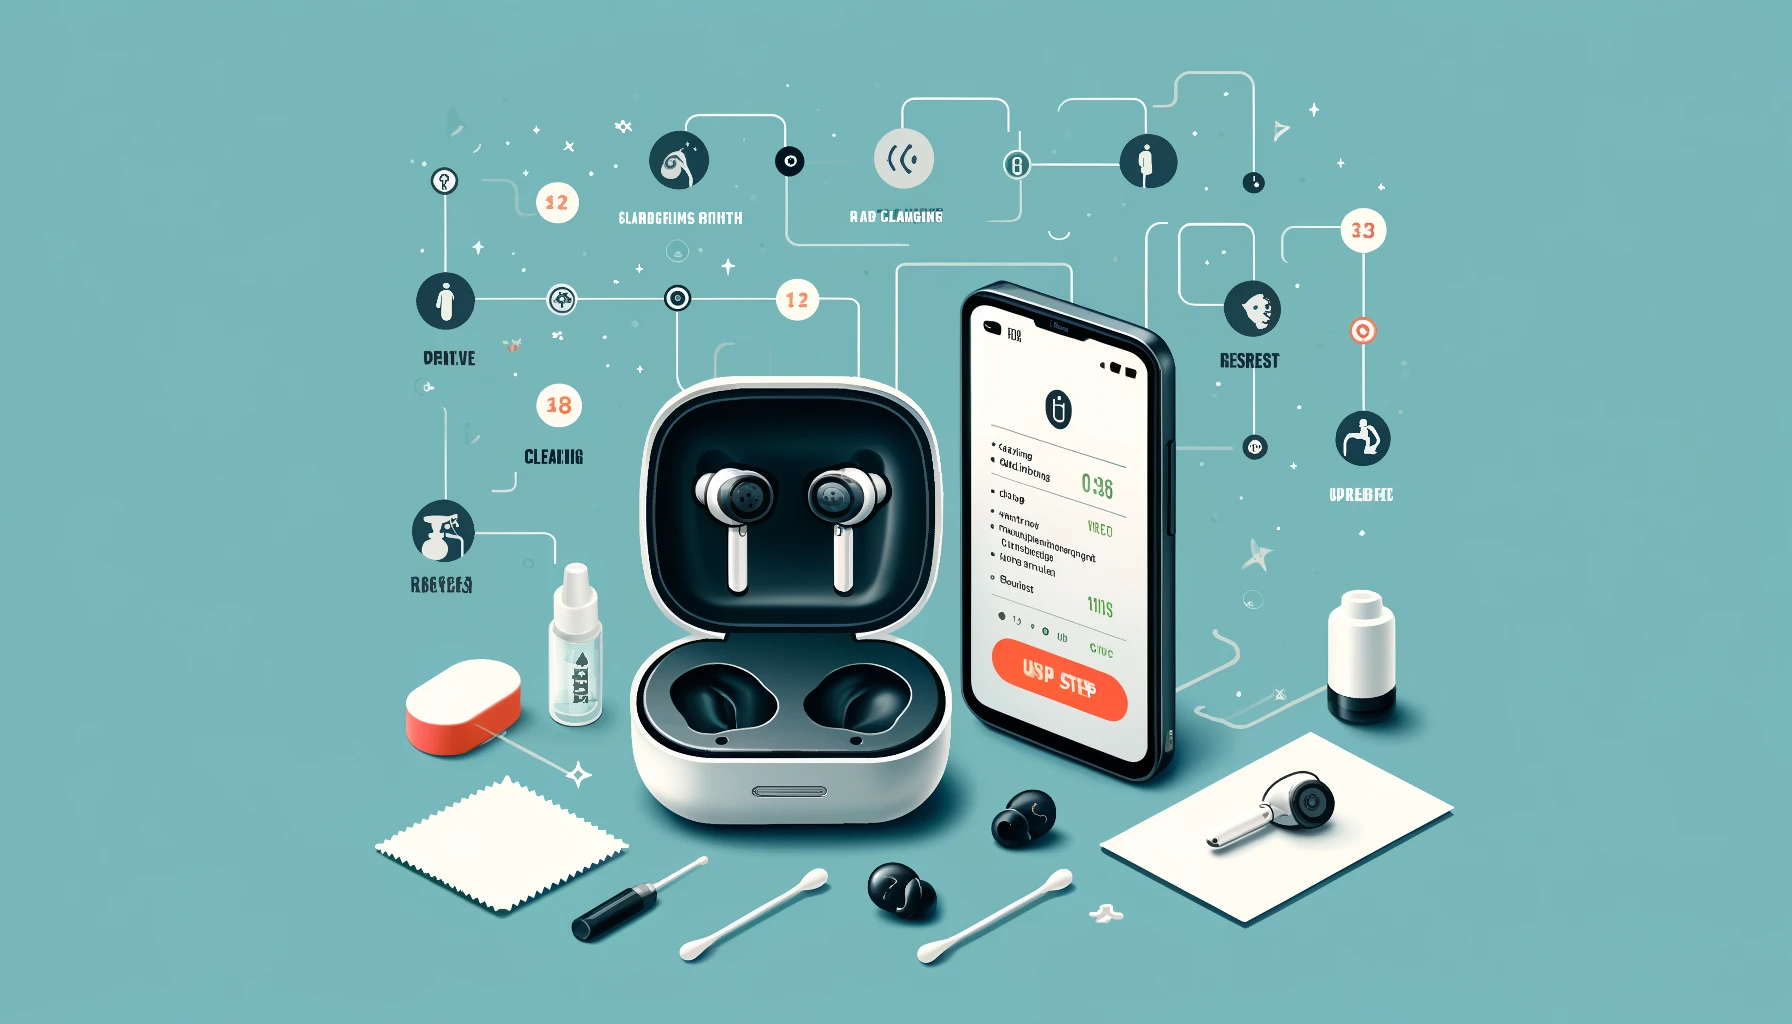
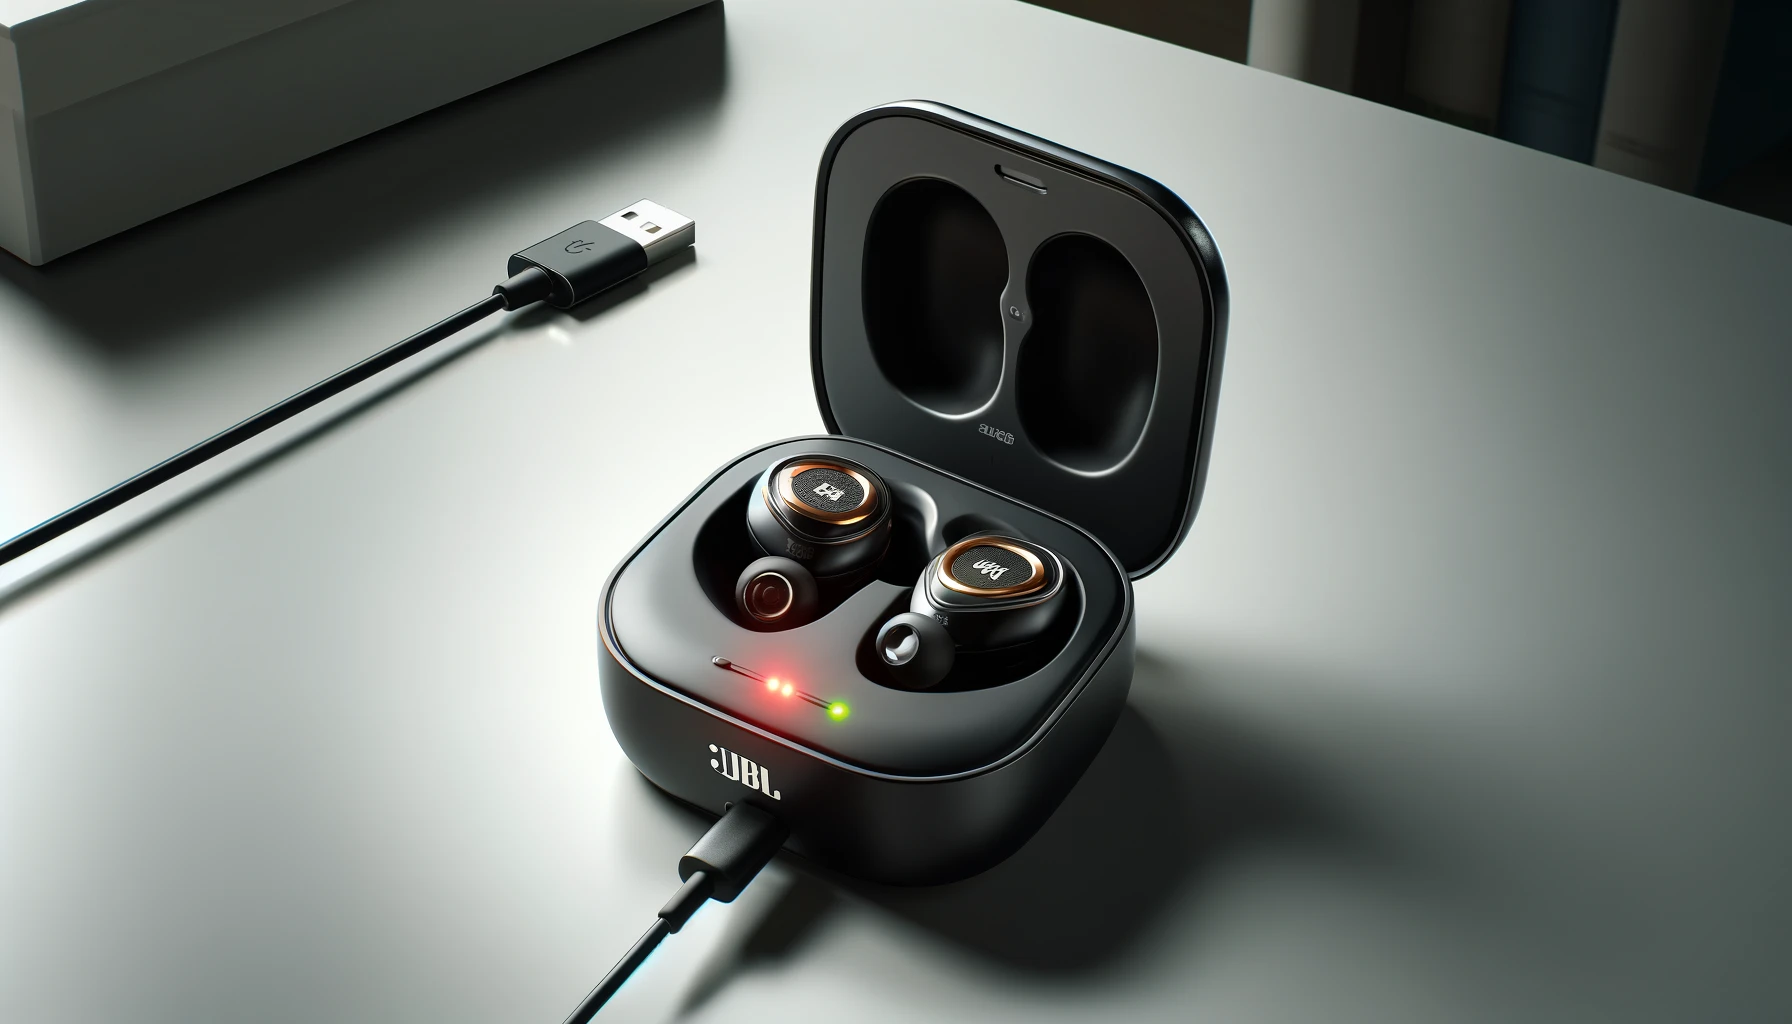
In this article, we delve into the common issue of JBL Endurance Peak 2 not charging and provide a comprehensive guide to troubleshoot and fix this problem. We begin with a quick overview of the headphones’ features, followed by identifying signs that indicate the earbuds are not charging.  We then explore potential causes such as dust accumulation, improper fit in the charging case, and issues with the charging case itself. Finally, we offer step-by-step solutions including cleaning the earbuds, ensuring proper placement, resetting, and updating the earbuds, along with advice on handling charging case issues. JBL Endurance Peak 2: Quick Overview The JBL Endurance Peak II Waterproof True Wireless Sport Headphones in black offer powerful JBL Pure Bass sound, providing an extra push during workouts. With 30 hours of total playback time and a Powerhook design for a secure fit, these headphones are perfect for any activity.  Dual Connect technology allows for flexible use and hands-free calls, ensuring you stay connected without disrupting your momentum. Enjoy the freedom of Bluetooth connectivity and the convenience of voice assistant access to enhance your fitness experience. Sign That Show JBL Endurance Peak 2 Not Charging If you want to fix the not charging issue with your JBL Endurance Peak 2 earbuds, first, make sure that your earbuds are indeed not charging by noting specific signs. Once you are certain that your earbuds are not charging, you can proceed with the fixing methods. Try to turn on your headphones. If they do not turn on, it means there is likely an error with the charging, because if they are not charged, they won’t turn on. Check if there is a red light on your earbuds that is constantly blinking. This indicates that they are not charging and their battery is low. By observing these signs, you can confirm that your earbuds are not charging. Why JBL Endurance Peak 2 Not Charging: Top Reasons When you are certain that your JBL Endurance Peak 2 earbuds are not charging, it’s important to identify the reasons behind this issue. Dust Problem Dust can be a significant issue preventing your earbuds from charging. When you use your earbuds, dust and earwax can accumulate on them, which can interfere with the connection points.  If the connection points on your earbuds are dirty, they may not establish a proper connection with the charging points, preventing them from charging. Therefore, dust and dirt can be a major reason why your JBL Endurance Peak 2 earbuds are not charging. Not Fitting in The Hole Additionally, it is possible that your earbuds are not fitting properly into the charging case, which can prevent the charging points from establishing a connection. Several reasons can cause this improper fit: As a result, the earbuds may not sit properly in the charging case, causing the charging connection to fail and preventing your earbuds from charging. Charging Case Problem Additionally, the charging case itself can be a significant reason for the earbuds not charging. If you want to charge your JBL Endurance Peak 2 earbuds, it is crucial that the charging case is also charged.  If your charging case is damaged, its battery is dead, or the charging cable is not working, it won’t be able to charge your earbuds. Therefore, a faulty charging case can cause charging issues for your earbuds, and you may encounter charging errors. Unknown Reasons In addition to these steps, there could be many unknown reasons causing the JBL Endurance Peak 2 not charging issues. Compare: JBL Endurance Peak 2 vs Skullcandy Push Active JBL Endurance Peak 2 Not Charging: Fix It We have identified the reason why your earbuds are not charging. Now, let’s follow the steps to fix this issue step by step  Clean The Buds We have observed that if the earbuds are dirty, they may not charge properly. So, before anything else, clean your earbuds. If the earbuds are clean, the connection within the charging case will also be established properly, and they will start charging.  You will need a few items to clean your earbuds and the charging case: a cotton cloth, cotton swabs, and isopropyl alcohol. Use the cotton cloth to clean the inner part of the charging case and the charging pins of the earbuds thoroughly. Dip a cotton swab in a small amount of isopropyl alcohol and let it dry a bit. Gently clean the connections of your earbuds and the inner part of the charging case with the cotton swab. Finally, use the cotton cloth to wipe everything down one last time. Once you have cleaned the earbuds and the charging case, place the JBL Endurance Peak 2 earbuds back in the charging case and start charging them. This should resolve the issue, and your earbuds should start charging. Place Them Properly As I mentioned before, if your earbuds are not properly placed, they may show a not charging error. Make sure the charging case is properly closed. Follow these steps: Ensure the earbuds are correctly placed in the charging case. Close the charging case firmly so that it remains securely closed and the connection is not lost. Ensure that the plug for the earbuds is not damaged and is properly fixed in the charging hole. By following these steps, you can establish a proper charging connection for your earbuds. Reset The Earbuds If you have tried all the methods and your earbuds are still not charging, you can try resetting your earbuds to fix the JBL Endurance Peak 2 not charging issue. We have written a separate article on how to reset your JBL Endurance Peak 2 earbuds.  You can read our article on resetting earbuds for detailed instructions, which will be very beneficial for you. By reading the article, you will gain detailed knowledge about resetting methods, which could help solve your charging problem. Update Your Earbuds Additionally, you can also fix the not charging issue by updating your earbuds. If you want to update your earbuds, follow our provided … Read more

How to Reset JBL Endurance Peak

Resetting your JBL Endurance Peak earbuds can be a simple yet effective solution to troubleshoot various issues you might encounter. Whether you’re experiencing connectivity problems, charging issues, or unresponsive earbuds, performing a reset can often resolve these issues and restore your earbuds to optimal functionality. In this guide, we’ll walk you through the steps to reset your JBL Endurance Peak earbuds, ensuring you can enjoy uninterrupted audio experiences. Errors That Can Be Fixed By Resetting JBL Endurance Peak Left Earbud Stopped Working Many JBL Endurance Peak users have reported that their left earbud does not connect to their phone or the right earbud.  Actually, I want to explain that the JBL Endurance Peak earbuds are designed to connect through the right earbud. When you are listening to music or receiving a call, your JBL Endurance Peak left earbud loses connection, it switches to mono mode.  Mono mode is a feature where only the right earbud functions for music or calls, and the left earbud automatically unpairs. After the call ends, the left earbud often does not reconnect to the right earbud, which is a common complaint among users. If you are facing this issue, you should try resetting your earbuds as our method suggests below, because resetting is the solution to this error. Read Here: JBL Endurance Peak One Side Left or Right Earbud Not Working JBL Endurance Peak Not Charging Issue Additionally, users of the Endurance Peak often report that their earbuds are not charging. The JBL Endurance Peak not charging issue can be resolved using several methods.  We have detailed various methods in our article “JBL Endurance Peak not charging: Fix It“, and one of these methods is resetting.  Yes, you can fix the not charging issue by performing a soft or hard reset of your earbuds. This error can sometimes be resolved through resetting. If you want to fix this error by resetting, follow the steps we have provided. JBL Endurance Peak Won’t Connect Additionally, many users report issues with their JBL Endurance Peak not connecting. If you are facing this type of error, resetting them might be the best solution.  Follow our provided steps to reset your JBL Endurance Peak, and then pair jbl endurance peak With your device. If you want to learn the detailed steps on how to reset, please read our article. Read: JBL Endurance Peak Review: By Decisive Sound Steps For Soft Reset JBL Endurance Peak If you want to reset your JBL Endurance Peak earbuds, I recommend that you first try the soft reset method.  A soft reset will not restore your earbuds to their default settings and will not result in any data loss.  Therefore, I suggest that you first try a soft reset. If you are facing any errors or issues that require resetting, a soft reset should be your first step. To perform a soft reset, follow these steps: Take both of your earbuds and place them in the charging case. Leave them in the charging case for about 10 Seconds. After 10 Seconds, take the earbuds out of the charging case. Turn on your earbuds by pressing the power button. Once your JBL Endurance Peak earbuds are turned on, they should be soft reset. This simple method allows you to reset your earbuds without losing any data. Steps for Hard Reset JBL Endurance Peak If you need to, you can hard reset your earbuds, but keep in mind that doing so will restore your earbuds to their default settings.  This means that any original files or saved data will be lost during the hard reset and cannot be recovered.  So, if you choose to go ahead with the hard reset, you need to be aware of these points. To reset your earbuds, follow these steps: Place your JBL Endurance Peak in the charging case. While charging, Click the sensor area once. After clicking once, press and hold the sensor area for at least 20 seconds. Release your finger after 20 seconds. Turn on your earbuds. Your earbuds will now be hard reset. Resetting Reset JBL Endurance Peak With JBL APP JBL has an app that provides many features to JBL users, including the ability to reset their earbuds. However, not all JBL models are compatible with the JBL app. What I mean is that the app may not be compatible with your specific JBL model. I visited the official JBL website to find out if the JBL Endurance Peak earbuds are compatible with the JBL app, but I didn’t find a clear answer. The JBL Endurance Peak was not listed in the compatibility list. You might want to try connecting your Endurance Peak with the JBL app to see if it works. First, try connecting your Endurance Peak to the app.  If they are compatible, they will connect. If not, they won’t connect.  If they are compatible, connect your earbuds to the app and scroll down to see various options. Look for the “Support” section and click on it.  Then, you will see more options, including “Reset to Factory Settings.”  Select this option, and a confirmation button will appear.  Press the reset button to confirm. Doing this will factory reset your earbuds. Read Here: How to Reset Jbl Endurance Peak 2 Compare JBL Endurance PEAK With Others Jbl Endurance Peak vs Jbl Endurance Peak 2 Conclusion Resetting your JBL Endurance Peak earbuds can effectively resolve common issues such as connectivity problems, charging failures, and unpairing of the left earbud. By following the provided steps for soft and hard resets, you can restore your earbuds to optimal performance.  If these methods don’t work, the JBL app might offer additional support. Implement these solutions to enjoy uninterrupted, high-quality audio experiences with your JBL Endurance Peak earbuds. Aneeq Aish ChoudharyAneeq Aish takes immense pride in being a dedicated researcher, committed to helping individuals like you make well-informed and decisive choices before purchasing or fixing any sound-related equipment like headphones & speakers. decisivesound.com

How to Pair JBL Endurance Peak & Fix Pairing Issues

How to Pair JBL Endurance Peak

This article provides step-by-step instructions on how to pair your JBL Endurance Peak earbuds with various devices, including Android phones, iPhones, and laptops. It covers essential preliminary steps such as ensuring the earbuds are fully charged and placing them in pairing mode.  Additionally, the article offers troubleshooting tips for common connectivity issues, including how to reset the earbuds and reattempt the pairing process.  By following these guidelines, you can easily connect your JBL Endurance Peak earbuds to your desired device and resolve any connection problems you might encounter. Steps To Take Before Pairing Your JBL Endurance Peak Earbuds Charge Them Properly If you’re trying to connect your JBL Endurance Peak with an available device, first ensure that it’s fully charged. If it’s not charged, it won’t turn on, and you’ll be unable to connect.  If you suspect jbl endurance peak not charging issue and face related errors, read our article to fix the jbl endurance peak not charging issue. Put Them In Pairing Mode To pair the JBL Endurance Peak, you first need to put it into pairing mode. There are 3-4 ways to do this, which I’ll detail for you: In most cases, simply removing the JBL Endurance Peak from the case will automatically put it into pairing mode. If not, after taking the JBL Endurance Peak earbuds out of the case, tap the top of the JBL Endurance Peak earbud twice to enter pairing mode. If that doesn’t work, try placing your finger on the touch control area of the earbud and keep pressing it for at least 5-10 seconds. It should then enter pairing mode. Another way to put the JBL Endurance Peak into pairing mode is to gently bend its arm away from the ear tip and then release it. This should trigger the pairing mode. Follow any of these steps, and when you see the upper blue light turn on, it means the earbud has entered pairing mode. Ensure They are In Range If you want to connect your JBL Endurance Peak to a device, remember to keep them within the range of the desired connected device. The range is up to 10 meters, so ensure they are within this range. How to Pair JBL Endurance Peak To Android If you want to connect your JBL Endurance Peak earbuds to an Android device, first ensure that both your earbuds and Android device have Bluetooth turned on.  To turn on Bluetooth on your Android device, go to its settings, find the Bluetooth option, and press it to switch it on.  Once Bluetooth is turned on, the available devices will be shown.  Find and select the name of your JBL Endurance Peak earbuds from the list.  By following these steps, your earbuds should connect to your Android device. How to Pair JBL Endurance Peak To Iphone If you want to connect your JBL Endurance Peak earbuds to an iPhone, first ensure that both your iPhone and earbuds have Bluetooth turned on.  If not, go to the settings on your iPhone, find the Bluetooth option, and click on it to turn it on.  Then, look for your JBL Endurance Peak earbuds under the available devices and select them to connect.  By doing this, your earbuds should successfully connect to your iPhone. How to Pair JBL Endurance Peak To Laptop If you want to connect your JBL Endurance Peak earbuds to a laptop, first ensure that your earbuds are in pairing mode.  Then, go to the bottom left corner of your laptop screen and click on the Windows icon.  From there, go to Settings and click on the option for Devices.  Next, click on Bluetooth & other devices.  Turn on Bluetooth if it’s not already on, and find your earbuds in the list of available devices. Select your earbuds to connect them to your laptop. By doing this, your earbuds should successfully connect to your laptop. JBL Endurance Peak Won’t Connect: Fix It Reset Your Earbuds If your earbuds are not connecting to the device after completing all the steps, there might be an error with your earbuds. To fix this, you should first reset your earbuds.  After resetting, try to connect your earbuds to the device again by following the step-by-step instructions.  This should resolve the issue and your device should connect. If you need instructions on resetting your earbuds, please read our article on How to Reset JBL Endurance Peak. Thank you. Turn Them On At the Same Time If your earbuds are not connecting to the device, try this method: place your earbuds inside their case for a few seconds. Then, take them out and try connecting them to your device again.  This time, your earbuds should be in proper condition and should connect to your device successfully. Read Here: Fix Jbl Endurance Peak 2 Not Pairing Issue Conclusion In conclusion, successfully pairing your JBL Endurance Peak earbuds with various devices is a straightforward process when following the right steps. Ensuring the earbuds are fully charged and in pairing mode are crucial initial steps.  With the detailed instructions provided for connecting to Android phones, iPhones, and laptops, along with troubleshooting tips for common issues, you can enjoy a seamless and hassle-free experience.  By adhering to these guidelines, you can easily resolve any connectivity problems and make the most of your JBL Endurance Peak earbuds. Read Here: Jbl Endurance Peak vs JBL Peak 2 Aneeq Aish ChoudharyAneeq Aish takes immense pride in being a dedicated researcher, committed to helping individuals like you make well-informed and decisive choices before purchasing or fixing any sound-related equipment like headphones & speakers. decisivesound.com

JBL Endurance Peak Not Charging: Fix It

JBL Endurance Peak Not Charging

In this article, we have delved into the common issue of JBL Endurance Peak earbuds not charging and provided comprehensive solutions to address this concern.  We begin by highlighting the signs indicating the earbuds are not charging, emphasizing the importance of accurately diagnosing the problem. We then proceed to outline various troubleshooting steps, ranging from simple cleaning techniques to more technical procedures such as hard resetting the earbuds.  Additionally, we offer guidance on ensuring proper placement of the earbuds in the charging case and suggest restarting the connected device as a potential solution. The article covers specific fixes for both the left and right earbuds, ensuring a comprehensive approach to resolving the charging issue.  We aim to provide readers with practical solutions to effectively tackle the JBL Endurance Peak not charging issue and restore functionality to their earbuds. Signs That Shows JBL Endurance Peak Not Charging If you need to diagnose any disease, the first step should always be to determine if the disease is present. Therefore, if you feel like your JBL Endurance Peak is showing the not charging issue, first check whether it’s indeed a charging issue or something else. If your JBL Endurance Peak isn’t turning on, it’s possible that their battery level is dead, preventing them from turning on. Additionally, if the red light is constantly flashing, it means that the JBL Endurance Peak isn’t charging, and their battery level is low, causing the red light to flash to indicate a low battery level. How To Fix JBL Endurance Peak Not Charging Issue The JBL Endurance Peak has a charging issue. There are various methods to fix the JBL Endurance Peak Not Charging issue, some simple and others more technical.  I will guide you through these methods, starting from the simplest and progressing towards technical solutions. Remember to read these instructions carefully and apply them with caution. Clean The JBL Endurance Peak Earbuds The first step is to clean your JBL Endurance Peak earbuds. This is because if the charging contact points are dirty, they will not be able to establish a proper connection with the charging case, and you will face a charging issue.  However, clean them with great care, as excessive force could damage them. Follow my instructions carefully: First, use a cotton swab to clean the JBL Endurance Peak earbuds and charging case thoroughly. This is crucial because if you use alcohol directly without cleaning, the dirt will get stuck and make things worse. It could even damage your earbuds. Next, grab a cotton swab and dampen it slightly with rubbing alcohol. Gently rub the damp cotton swab on the charging contacts of both the JBL Endurance Peak earbuds and the charging case. Be careful not to apply too much pressure or use the alcohol directly on the earbuds. Once finished, use a clean cotton cloth to dry the earbuds and charging case completely. Additionally, a pencil eraser can also be used for cleaning. The graphite and rubber in the eraser can help clean the charging contacts. Just gently rub the eraser on the contacts. Place Earbuds Into Their Respective Holes If the charging contacts have been cleaned but the JBL Endurance Peak earbuds still aren’t charging, it may mean that the connection between the charging points is not established properly because the earbuds haven’t been placed correctly in the charging case.  Follow these tips to ensure proper charging: Ensure that you place the JBL Endurance Peak earbuds properly in the charging case and make sure to close the lid completely.  Avoid putting pressure on the lid as it can misplace the earbuds and make it difficult to establish a connection with the charging contacts. Additionally, you can gently shake the earbuds to ensure they are properly seated.  Do not force them, as it’s possible that over time, the charging points will establish a connection, as the earbuds’ connectors will fit snugly into the hole of the case. Make sure to ensure that your earbuds’ arms are not bent. If they are bent, they may not be properly placed in the correct position, resulting in a failure to establish a charging connection. Therefore, fix any bent arms and then place them correctly to establish the connection. Hard Reset Your Earbuds For fixing the JBL Endurance Peak Not Charging issue, a great method is to perform a hard reset. Hard resetting can restore many settings to its default value, but it requires following a series of steps.  We have written a detailed article on how to reset JBL Endurance Peak earbuds. Reading our ‘how to reset earbuds’ article can be quite helpful for you. Restart Your Device If you are still facing the JBL Endurance Peak Not Charging issue, I’d recommend you try powering off the device once and then turning it back on.  If you are trying to connect your earbuds with a device, make sure to power off and then power on both the earbuds and the device you are attempting to connect them with.  Doing this can refresh the connections, and hopefully, the charging connection will establish. For instance, if you are using an Android device, press and hold the power button to bring up the power options, then tap on the power off button to shut down the device. Hold the power button for about 10 seconds and then release it. Keep holding it until your device doesn’t restart again. Read Here: Fix Jbl Endurance Peak 2 Not Charging Issue JBL Endurance Peak Left Earbud Not Charging: Fix It For your JBL Endurance Peak left earbud not charging, ensure meticulous cleaning and proper placement. Use a cotton swab with rubbing alcohol to clean contacts and place earbuds securely in the charging case.  Avoid pressure on the lid and check for bent earbud arms.  If the issue persists, consider a hard reset and device restart. With these steps, you’ll tackle the charging problem head-on! JBL Endurance Peak Right Earbud Not Charging: Fix It To fix the issue of the right … Read more

How to Pair JBL Tune 510bt: A Complete Guide

How to Pair JBL Tune 510bt

Welcome! I’ll guide you through how to pair the JBL Tune 510BT headphones with various devices simultaneously or separately. First, I’ll explain how to enter pairing mode, and if you encounter any issues, I’ll discuss how to troubleshoot them.  I’ll also explain how to connect them with various devices. Additionally, I’ll cover how to fix connection issues if your JBL Tune 510BT headphones aren’t connecting.. Finally, I’ll clarify whether you can connect them with your app. Please read our complete article for detailed instructions. How To Enter Pairing Mode On JBL Tune 510bt To pair JBL Tune 510bt headphones, the first step is to put it into pairing mode. Pairing mode is a feature that enables the JBL Tune 510bt headphone to be ready to connect with another device.  Therefore, to connect with any device, the headphone needs to be in pairing mode first.  To put the JBL Tune 510BT into pairing mode, you need to follow simple steps. The JBL Tune 510BT automatically enters pairing mode when turned on.  To turn them on, press the power button for 5 seconds. The power button will start indicating light, rapidly flashing, indicating that the headphones are turned on.  Once the headphones are turned on, the JBL Tune 510BT will enter pairing mode automatically. After pairing, you can connect it with different devices. Read Here: JBL Tune 510bt Headphones Review JBL Tune 510bt Not Entering Pairing Mode: Fix It Sometimes, when you turn on the JBL Tune 510BT, it doesn’t enter pairing mode automatically. Instead, you need to take some extra steps to help it enter pairing mode. I’ll guide you through those extra steps.  If your JBL Tune 510BT doesn’t enter pairing mode automatically when powered on, you can follow these steps to manually enter pairing mode. Long Press The Bluetooth Button First, locate the Bluetooth button on your JBL Tune 510bt headphone earpiece. Along with the power off/on and volume up/down buttons, there should also be a Bluetooth button.  Press and hold it for 5 seconds or more until you start seeing an indicator light flashing. Then, release it. It’s expected that by doing this, your JBL Tune 510BT will enter pairing mode. Simultaneously Press + & Pause Button Apart from that, many users have suggested to us that by pressing and holding the volume up & pause/play button for 5 seconds or more, the JBL Tune 510BT enters pairing mode.  If the other method doesn’t work, press and hold the volume up button & the play/pause button simultaneously for 5 to 10 seconds to enter JBL Tune 510bt in pairing mode. Note the LED indicator; if it starts blinking rapidly, release the buttons. It is expected that your Bluetooth device has now entered pairing mode. Reset The JBL Tune 510bt If your JBL Tune 510BT doesn’t enter pairing mode using the two methods mentioned above, I would suggest performing a hard or soft reset.  A hard or soft reset can fix various issues and essentially restores your JBL Tune 510bt headphones to a new state, eliminating any remaining faults.  To perform a soft or hard reset on your JBL Tune 510BT, you’ll need to follow simple steps to reset JBL Tune 510bt headphones Despite fixing the not entering pairing mode issue, resetting can also fix jbl tune 510bt one side not working error. How to Pair JBL Tune 510bt  Now, let me tell you how to connect your JBL Tune 510BT with your app, android, laptop, or mobile device now that it has entered pairing mode and any pairing errors have been fixed. How to Connect JBL Tune 510bt With Android If you want to connect your JBL Tune 510BT with an Android device, follow these steps.  Make sure your JBL Tune 510BT is already in pairing mode.  Turn on the Bluetooth on your Android device by going to the Android settings.  There, you’ll see a folder named Bluetooth; click on it to open.  When you open it, you’ll find a button to turn Bluetooth on/off.  Turn it on. Now, your Bluetooth is enabled.  In your Bluetooth settings, you’ll see available devices, including your JBL Tune 510BT.  Click on the JBL Tune 510BT option on your Android device.  By doing this, your Android device will be connected to your JBL Tune 510BT. Now, you have successfully connected your Android device with your JBL Tune 510BT. How to Connect JBL Tune 510bt With IOS  To connect your JBL Tune 510BT to your iPhone, follow these steps: Go to your iPhone’s settings. Click on the Bluetooth option there. Turn on the Bluetooth toggle. In the list of available devices, find the JBL Tune 510BT. Click to connect. You have now connected your JBL Tune 510BT with iOS. How to Pair JBL Tune 510bt With Laptop If you want to pair your JBL Tune 510bt headphones to your laptop, follow these steps: Go to the Window icon in the bottom left corner of your laptop and click on it. A settings option will appear; click on it. Then, from the next options that appear, click on the “Devices” option. There will be a button to turn on Bluetooth; click on it to turn it on. In the list of available devices, search for your JBL Tune 510bt headphones and click on it to connect your JBL Tune 510bt headphones to the laptop. How to Pair JBL Tune 510bt With Macbook To connect your JBL Tune 510BT to your MacBook, follow these steps: Open your MacBook. Go to Bluetooth settings by searching for it and clicking on it. Turn on Bluetooth and look for available devices. Find and click on the JBL Tune 510BT. Now, you have successfully connected. How to Pair JBL Tune 510bt With JBL APP Unfortunately, you cannot connect the JBL Tune 510BT with the app. There is no feature available for connecting the JBL Tune 510BT, and we are not sure why this is the case.  However, we once contacted the JBL Tune 510BT support team on this … Read more

JBL Tune 510bt Not Charging: Fix it 

JBL Tune 510bt Not Charging Fix it

People who use the JBL Tune 510BT are complaining that their headphones are not charging.  If it doesn’t charge, they won’t be able to use it, which is why I am going to discuss the common reasons behind the JBL Tune 510BT not charging issue and how to fix it in detail.  After reading our article, you won’t need to look elsewhere for advice. Stay with us. Battery Related Information for JBL Tune 510bt  Before diving into the details of any issues with the JBL Tune 510BT not charging, I want to share some information about the JBL Tune 510BT’s battery and charging related aspects. These are wireless headphones that offer up to 40 hours of playtime.  You can easily charge them using a convenient Type-C USB cable. A quick 5-minute charge can provide up to 2 hours of additional playtime. How Do I Know If JBL Tune 510bt Are Charging? The JBL Tune 510BT comes with a convenient Type-C USB cable for charging. When you start charging your JBL Tune 510BT headphones, a red light will begin to blink on this convenient Type-C USB cable, and in some cases, you might also hear a beeping sound. This indicates that your headphones are charging. When the red light on the convenient Type-C USB cable turns off and the green light starts to illuminate, understand that your headphones are fully charged, and you can start using them. Remember, the charging time for the JBL Tune 510BT is 2 hours. They should be fully charged within these 2 hours. If you have had them on charge for more than 2 hours and the red light is still on, it means JBL Tune 510BT is not charging. In this case, you will need to fix this issue.  Read Here: JBL Tune 510bt One Side Not Working Common JBL Tune 510bt Not Charging Problems JBL Tune 510bt Charger Won’t Fit Users of the JBL Tune 510BT often complain that when they purchase the JBL Tune 510BT, the charger that comes with it is often of poor quality.  I’ve noticed that the port on the JBL Tune 510BT headphones is small, while the charger’s size is larger, which causes it not to fit properly, making charging almost impossible JBL TUNE 510BT Flickering Red Dot Your JBL TUNE 510BT headphones may not charge properly and display a red light that flickers approximately every 8 seconds.  Despite charging the JBL TUNE 510BT headphones for a duration of one to two hours, the battery indicator still shows a low battery level, indicating that the headphones have not been charged effectively.  This issue suggests a possible malfunction in the charging mechanism or a fault in the battery itself, leading to inadequate charging despite the allotted time. Read Here: JBL Tune 510bt Headphones Review 510bt Only Charging to 40% In many cases, it has been observed that the JBL Tune 510BT headphones do not charge beyond 40%, meaning once their charging level reaches 40%, they stop charging. This is a common issue and could be due to various unknown reasons. Steps To Fix JBL Tune 510bt Not Charging Issue JBL Tune 510bt not charging is one of the common JBL tune 510bt errors. To fix the JBL Tune 510BT Not Charging Issue, follow the steps provided below. Find The Charging Port Carefully If the charger size is too large and does not match the smaller size of the port, but check if a USB cable is also included with the charger, then you can use this USB cable for charging. Similarly, fully inspect your earpiece and headphones.  They usually have two ports on top. Search for the charging port that matches the size of the charger; it will be there, often located on the right side, and will be the correct size for the charger. Charge For Extra Hours ( 8 Hours ) Before investing in a new cable or charger, I would suggest that you try charging your JBL Tune 510BT headphones for an extended period.  I understand that their charging time is 2 hours, but sometimes electrical devices encounter some unknown issues. Therefore, try charging your headphones continuously for up to 8 hours.  You could leave them charging overnight and then check them in the morning. Hopefully, they will be charged.  This isn’t something I recommend doing daily, but try it once or twice as a late-night charge, and then hopefully, the issue will be fixed, and you’ll be back to the usual 2-hour charging time. Check Every Little Thing Furthermore, I would suggest checking every small detail before attempting to fix the JBL Tune 510BT not charging issue. Ensure that the port on your headphones is clean; if it’s not, clean it thoroughly with cotton and a matchstick.  Check whether the charger connector fits securely into your headphones or not, and make sure it’s not loose. By checking every little thing, I hope you’ll be able to fix the JBL Tune 510BT not charging issue by paying attention to these small details Try a New Type-C USB Cable If you are facing the JBL Tune 510BT Not Charging Issue, I would recommend trying a different Type-C USB cable, as the cable might be faulty. In most cases, 9 out of 10 people suggest that when they used a new cable, the charging issue was resolved.  Actually, many users have complained about the cables of JBL brand products, and changing the cable often fixes the issue. Therefore, I would also recommend that you change the cable. Try a New Charger If changing the cable doesn’t fix the issue, then I would suggest that you try changing the charger. The issue might lie with your charger. When you change the charger, make sure that it is rated for at least 2.0A (2 amps) output. Change The Battery If you have followed all the tests mentioned above and are still facing the not charging issue, it means that the battery of your headphones might be dead, and you may … Read more

How to Reset JBL Tune 510bt: A Comprehensive Guide

How to Reset JBL Tune 510bt

Among the many models of JBL, one is the JBL Tune 510BT. Many users praise its features, while some have reported encountering errors. There are several issues which can be fixed by resetting JBL Tune 510BT.  In this article, I will show you how to reset the JBL Tune 510BT. The steps to reset the JBL Tune 510BT are quite simple if followed properly. During the resetting process, it’s important to keep a few things in mind, and after resetting, many common errors can be fixed.  I will discuss what those things are and which errors can be fixed in this article. Please make sure to read the article carefully. Things To Consider Before Resetting Before resetting the JBL Tune 510BT, keep the following points in mind to ensure you do not encounter any kind of glitch during the resetting process. Turn off Bluetooth: Before resetting the JBL Tune 510BT, the first step is to turn off its Bluetooth. To turn off the Bluetooth, pick up the JBL Tune 510BT and press and hold the Bluetooth button located on the backside of the earpiece for 5 seconds or more. Doing this will turn off its Bluetooth. Disconnect The Devices: Make sure that your JBL Tune 510BT’s Bluetooth is turned off. After that, turn off the Bluetooth of your device as well, ensuring that headphone is not connected to any other devices.  If you are an Android user, you can go into the settings menu, find the Bluetooth option, and turn it off from there. By doing so, if your JBL Tune 510BT is connected, it will be disconnected. Read Here: How to Pair JBL Tune 510bt Steps To Perform Soft Reset JBL Tune 510bt: Let me now show you how to perform a soft reset on the JBL Tune 510BT. This is not a difficult task; a soft reset is much simpler compared to a hard reset and is essentially like turning headphones off and then on again. A soft reset is done to fix minor issues and glitches without losing data or saved settings on the headphones. To perform a soft reset, follow the steps below: Pick up your JBL Tune 510BT. Press and hold the power button for 5 seconds or more to turn it off. Wait for 10 seconds. Then press the power button again to turn it back on. There you go, your JBL Tune 510BT has been soft reset. Steps To Perform Hard Reset JBL Tune 510bt: Now, I’ll tell you about performing a hard reset on JBL Tune 510bt, also called a factory reset. By doing a hard reset, your JBL Tune 510BT will go back to its original state, just like when it was new, with all saved files and settings deleted.  This is done to fix large and major errors. To perform a hard reset, follow the steps below: Pick up your JBL Tune 510BT. Press and hold the volume up and volume down buttons at the same time. Keep them pressed for at least 15 seconds or more. By doing this, your JBL Tune 510BT has been hard or factory reset. A Quick Difference Between Soft & Hard Reset Aspect Soft Reset Hard/Factory Reset Definition Reboot device Restore original settings Data Loss No data loss Erases all data Purpose Fix minor glitches Fix significant issues Process Quick, simple Extensive, thorough How to Reset Bluetooth on JBL Tune 510BT: Often, there are situations where instead of resetting the headphones, you need to reset the Bluetooth of the JBL Tune 510BT. Now, I will also tell you how you can reset the Bluetooth of the JBL Tune 510BT. To reset the Bluetooth of the JBL Tune 510BT, follow the steps outlined below Turn on your JBL headphones by pressing the power button. Then, press and hold the Bluetooth button on the headphones for 5 seconds or more. Note that when the LED ring on the JBL Tune 510BT starts flashing red, release the Bluetooth button. Now, turn off your JBL Tune 510BT and then turn it back on again. Your Bluetooth should be reset. Any devices previously connected will now be unpaired, so you’ll need to pair them again. Issues That Will Be Fixed After Resetting The JBL Tune 510bt: If you want to know why it is necessary to reset the JBL Tune 510BT, let me tell you the benefits. By resetting it, you can easily solve the following issues mentioned below if you encounter any JBL Tune 510bt errors with your Bluetooth headphones. JBL Tune 510bt One Side Not Working You can often perform a soft or hard reset on the JBL Tune 510BT to fix the ‘One Side Not Working’ error; it’s quite easy. If resetting the JBL Tune 510BT does not fix this error, then you can take some extra steps to fix the JBL Tune 510bt one side not working error. Dropped Signals: There is a drop signal error that JBL Tune 510BT headphone users often complain about. This error causes the headphone to drop the signal and not send any kind of signal even if it is turned off, with the blue light blinking continuously.  To fix this error, follow these steps: Reset your JBL Tune 510BT headphone and Bluetooth according to the steps given above.  You can also follow this step: Press and hold the volume up, volume down, and the adjacent pause/play button simultaneously for more than 10 seconds, then turn off your JBL Tune 510BT headphones. After 10 seconds, turn it on again, and hopefully, the drop signal error will be automatically fixed. Unable to Connect: Failure to connect is such an error that many users of JBL Tune 510BT complain about. They say that their headphones don’t connect to their devices, whether it’s a laptop or an Android, causing them to face difficulties.  Let me tell you, if you’re also a user of JBL Tune 510BT and facing the failure to connect error, you can fix this error by following the resetting … Read more

Fix JBL Tune 510bt One Side ( Left or Right ) Not Working

JBL Tune 510bt One Side ( Left or Right ) Not Working

The JBL headphones are a product from the JBL brand. The JBL Tune 510BT has an issue that many users have complained about, where one side of JBL Tune 510bt, either the left or the right earbud, does not work, resulting in no sound from that side.  Often, users, without paying much attention, may rush into opening up the earpiece to fix the issue, thereby potentially ruining their headphones. They may overlook some technical issues and immediately resort to resetting or repairing, which seldom solves the problem.  There’s a specific time and situation for every step that should be taken. In this article, we will guide you through various steps to fix the JBL Tune 510BT one-side not working issue and also tell you at what point each step should be taken to avoid causing any further damage and allow you to continue using your device. JBL Tune 510BT: Quick Overview Before fixing the issue, I want to give you an overview of the JBL Tune 510BT so that you have a clear understanding of everything while reading the article.  The JBL Tune 510BT is a wireless headphone. It is an on-ear type of headphone, with volume on/off buttons located on the edge of one earcup. Its earcups have an over-the-ear foam factor. It is wireless and available with Bluetooth 5.0 technology. Why JBL Tune 510bt One Side ( Left or Right ) Not Working: Top Reasons If you want to fix the JBL Tune 510BT One Side (Left or Right) Not Working issue, you need to know the reason behind its malfunction.  Only after understanding the reason can JBL Tune 510bt common error be fixed. If a doctor doesn’t know which part of the body is in pain, can they prescribe any medicine?  Exactly, so knowing the reason behind any problem is essential before trying to fix it. Let me explain to you the possible reasons behind the JBL Tune 510BT One Side (Left or Right) Not Working issue. Problem In The Device When many people report the JBL Tune 510BT One Side (Left or Right) Not Working issue, it has been observed that most of the time, the main problem lies with their own device.  Either their headphones get damaged due to some reason, or there is some issue with the mobile or laptop they are connected to. Most of the time, users of the HP ProBook face the JBL Tune 510BT One Side (Left or Right) Not Working issue. Unbalanced Audio Setting Another reason behind the JBL Tune 510BT One Side (Left or Right) Not Working issue could be that the audio balance settings in your device are incorrect.  Yes, if the device’s audio balance settings are messed up, sound may come from one earbud either very softly or not at all, making you think it is damaged. Consequently, you report the JBL Tune 510BT One Side (Left or Right) Not Working issue. Broken Connector/Wire If the headphone’s earpiece is opened, it is also discovered that the wires or connector inside are broken, which can be the reason you face this issue. Fix JBL Tune 510bt One Side ( Left or Right ) Not Working I have told you the possible reasons, now I will tell you the steps to fix this issue. First, I will tell you steps that can be taken without any technical information, and during which, making a mistake won’t cause any damage. After that, I will tell you the technical steps that need to be followed carefully to avoid any kind of damage. Tapping On The Headphones The easiest and simplest step you can take to fix the JBL Tune 510BT One Side (Left or Right) Not Working issue is to gently tap the back of the earbud that is not working.  Tapping it softly with your hand 2 to 3 times can make it start working again, and you won’t need to do anything else. Read Here: JBL Tune 510bt Not Charging: Fix It Turn The Volume Up To address this issue, you can also try raising the volume. Many people have suggested that when they increase the volume, the problem is resolved and both earpieces start working again. To increase the volume, press the + sign button that is located on the earpiece. After increasing the headphone volume, also increase the volume on your device, whether it’s a laptop or mobile, by pressing the volume increase button where it’s available. This will fix the issue. Replace Your Device We had discussed earlier that the error could be within your device, such as the HP ProBook, which users often face with this error.  Therefore, try changing your device. If you are facing this issue with a laptop, try connecting your JBL Tune 510BT headphones to a mobile device to see if the issue is fixed.  Conversely, if you are using a mobile, try connecting to a laptop to check if both earpieces work correctly there. If you don’t have an extra device, try connecting your existing device to a new Bluetooth connection to see if the error persists with that Bluetooth connection as well. Balance Your Audio Setting To resolve the issue of JBL Tune 510BT One Side (Left or Right) Not Working, potentially due to audio balance settings, here are the steps you should follow: First, you need to access the settings on your device. This can be done by simply opening your device and navigating to the “Settings” menu. Once in Settings, utilize the search function by looking up “audio balance.” This will help you quickly find the setting without having to manually browse through all the options. In the search results, select the option that mentions “audio balance.” This will take you directly to where you can adjust these settings. In the audio balance section, you will find the option to adjust the balance. Scroll until you find this specific setting and make the necessary adjustments to ensure the sound is evenly distributed between both earbuds. Update … Read more

How To Reset JBL Tune 700BT: Simple and Easy Steps

How To Reset JBL Tune 700BT

The JBL Tune 700BT is one of the models under JBL, known for its numerous features and popularity among users. However, it is prone to encountering errors, causing inconvenience to its users.  Many users have found that resetting the JBL Tune 700BT can often solve these errors. Resetting the JBL Tune 700BT is not a difficult task, and in this article, I will explain the method to reset JBL Tune 700 BT. JBL 700BT Overview: The JBL 700BT stands out in the market for its pure bass sound and unbeatable feature of 27 hours of battery life, allowing users to enjoy non-stop entertainment without worrying about recharging. Additionally, it offers multi-point connection capabilities, enabling hands-free calls and access to voice assistants for added convenience. With a rating of 3.8 out of 5, users have found the JBL 700BT to be a solid choice. However, the built-in mic could be improved, and the noise cancellation feature is not very effective. Overall, it’s a good-quality option for audio enthusiasts. Nevertheless, like any electronic device, the JBL 700BT earbuds may encounter occasional issues.  However, performing a reset can often resolve most of these issues. Before delving into the steps of resetting the JBL 700BT earbuds, it’s essential to grasp the reasons and occasions that call for a reset Why and When to Reset JBL 700BT? When considering the uncertainties surrounding when and under what circumstances we should initiate a reset for the earbuds, it’s common to resort to this solution for addressing various issues.  However, there are instances where a reset may not adequately resolve certain problems. Let’s explore in which scenarios we should proceed with resetting the JBL 700BT earbuds. Resolving Charging Problems: You might experience challenges with charging, such as inadequate charging or complete failure to charge, resetting your JBL 700BT earbuds may offer a solution. A reset can help troubleshoot charging-related issues and restore proper functionality. Audio Playback Issues: If you encounter problems with audio playback, such as the absence of sound or unresponsive playback control, that is the time when resetting your JBL 700BT earbuds would help rectify these issues and restore normal playback functionality. Software Glitches: If you notice unusual behavior or performance issues with the JBL 700BT, such as freezing or lagging, resetting them can help clear any temporary software glitches or conflicts. Connectivity Concerns: Sometimes JBL 700BT either fails to connect with your device, persistent issues with connectivity, such as frequent disconnections or difficulties connecting to audio sources, can often be resolved with a reset. Performing a reset in these scenarios can help address common issues with your JBL 700BT earbuds, ensuring they maintain optimal performance. Now, let’s explore the step-by-step process of resetting them. Steps To Reset JBL Tune 700BT To perform a factory reset on your JBL Tune 700BT headphones, follow these steps: 1. Ensure your headphones are turned on and no devices are paired with it. 2. Locate the “Volume Up” and “Volume Down” buttons on your headphones. 3. Press and hold both the “Volume Up” and “Volume Down” buttons simultaneously for about 5 seconds. 4. The LED light on your headphones should blink blue twice, indicating that the reset process has started. 5. Release the buttons after seeing the blinking LED light. 6. Your JBL Tune 700BT headphones are now reset to their factory settings. If your headphones were experiencing issues such as not turning on or connecting via Bluetooth, performing a hard reset like this can often resolve such issues. NOTE: Performing a hard reset will result in the deletion of all your data. Please be aware that any actions described here are undertaken at your own risk. When Resetting JBL 700BT Doesn’t Resolve The Issue? Firmware Update:  Users complained about the stuck button, in order to resolve the problem, check if there are any available firmware updates for your JBL Tune 700BT. Updating the firmware could potentially resolve issues related to power management by introducing improvements or bug fixes. Compatibility Issue:  Device compatibility is crucial for smooth device pairing, especially with the JBL 700BT headphones.  It’s essential to verify that the audio source you intend to pair with your JBL 700BT headphones is compatible. Specifically, ensure that it adheres to and supports Bluetooth 4.2 technology. Not showing up:  If the earbuds are not in the correct pairing mode or are not visible to your device, it can lead to connectivity issues. Making sure that the earbuds are set to the appropriate pairing mode improves the chances of a successful connection. Battery Level:  Before using the headphones for online meetings, ensure that they are fully charged. Insufficient battery levels may result in unexpected shutdowns during usage, causing inconvenience. Connection Stability:  Verify that the connection between the headphones and your device, whether it’s through Bluetooth or a wired connection, is stable.  Unstable connections can sometimes trigger power management issues, leading to disruptions in functionality. Ensuring a stable and reliable connection can help prevent such occurrences. Conclusion: the JBL Tune 700BT stands out among JBL’s models for its rich features, but it is not without its challenges. Users may encounter errors that disrupt their experience with the device. Fortunately, many have found that resetting the headphones can effectively address these issues.  Resetting the JBL Tune 700BT is a simple process, offering users a straightforward solution to common problems. With its user-friendly approach to troubleshooting, the JBL Tune 700BT continues to be a popular choice among consumers seeking reliable wireless headphones. Aneeq Aish ChoudharyAneeq Aish takes immense pride in being a dedicated researcher, committed to helping individuals like you make well-informed and decisive choices before purchasing or fixing any sound-related equipment like headphones & speakers. decisivesound.com

How To Reset JBL Tune 700 BT Headphones

Whether you're facing connectivity issues experiencing glitches or simply want to give your device a start it's important to know how to reset your JBL Tune 700 BT headphones.

Welcome to the world of experiences, with the JBL Tune 700 BT headphones! These headphones are sleek and versatile designed to enhance your music, calls and overall entertainment experience. However like any device there may come a time when you’ll need to reset your JBL Tune 700 BT headphones for performance. Whether you’re facing connectivity issues experiencing glitches or simply want to give your device a start it’s important to know how to reset your JBL Tune 700 BT headphones. In this guide we will take you through the step, by step process of resetting your headphones. Without any delay let’s delve into the steps that will assist you in resetting your JBL Tune 700 BT headphones. Preparation For Resetting JBL Tune 700 BT Headphones What happens if, during the process of resetting your JBL Tune 700 BT headphones? any damage occurs? your headphones do not turn on? your JBL Tune 700 BT headphones never charge or connect and you need to go in the direction of another pair of headphones.  The reason for these problems could be that you did not follow the proper steps to reset your JBL Tune 700 BT headphones, and they were not adequately prepared before the reset. In this section, we have provided you with a guide on how to prepare your JBL Tune 700 BT headphones for the resetting process, so that you can avoid these issues. Turn On Your JBL TUNE 700 BT Headphones To begin, just like every electronic device needs to be turned on or any issues inside it need to be resolved for repair, here you also need to turn on your JBL Tune 700 BT headphones. To turn on, simply locate the power button on your JBL Tune 700 BT headphones and press and hold it for approximately 3-5 seconds. Keep holding it until you see the LED lights flashing. Once the LED lights start flashing, release the power button. Your headphones are now turned on. Disconnect Your JBL Tune 700 BT Headphones  After turning on, you need to disconnect your JBL Tune 700 BT headphones from any previously connected device. “” You must have heard that if someone interrupts and starts speaking before you finish, it can be unpleasant! “” Well, this guide is focused on the complete process of connecting and disconnecting JBL Tune 700 BT headphones. Follow these steps. Charge Your Jbl Tune 700 BT Headphones (If Applicable) This preparation section is for users who do not have any charging issues with their JBL Tune 700 BT headphones.  They only want to address any other problems with their headphones.  Before starting the resetting process, it is essential to sufficiently charge your JBL Tune 700 BT headphones, as the resetting process utilizes the headphone battery. A minimum of 20% battery charge is necessary to initiate this process. Note: If your JBL Tune 700 BT headphones are specifically facing charging issues, you can simply skip these steps and proceed directly to the resetting process. How to Reset JBL Tune 700 BT Headphones Using Hard Factory Reset The term “hard factory reset” refers to the process of completely erasing all data and settings on your JBL Tune 700 BT headphones, as well as any connected devices.  In other words, if you wish to eliminate all the data and files on your JBL Tune 700 BT headphones, you can follow these steps. Before starting the hard factory resetting process, prepare your JBL Tune 700 BT headphones. To do this, Look at the above guide. Next, locate the volume up ( + ) and volume down ( – ) buttons on your JBL Tune 700 BT headphones. Once you find the buttons, press and hold them simultaneously for about 5 seconds. Continue holding until the LED lights on your JBL Tune 700 BT headphones start flashing. After the LED lights flash, release the volume buttons. Your JBL Tune 700 BT headphones have now been hard reset. Now, simply connect your JBL Tune 700 BT headphones to any device. Here’s the complete guide to connect your jbl tune 700 BT headphones.  How to Reset JBL Tune 700 BT Headphones Using Soft Factory Reset Soft factory reset refers to the process of resetting Jbl tune 700 BT headphones without losing any data or files.   In this section, the methods and steps are provided that can be followed to reset your JBL Tune 700 BT headphones without losing any data or files from other devices. Here are the Methods! Using Bluetooth Settings On Different Devices Using the Bluetooth settings on your device, you can perform a soft reset on your JBL Tune 700 BT headphones. We have provided instructions below on how to soft reset your JBL Tune 700 BT headphones using the Bluetooth settings on different devices. Windows: First, open the Bluetooth settings on your Windows. You can do it by simply clicking the start Button at the Bottom-left corner of the Home screen in windows. And then from the menu go to settings, then Bluetooth. Then, locate the JBL Tune 700 BT Headphones in the list of paired devices on the Bluetooth Setting’s page. Next, right-click on the JBL Tune 700 BT and select “Remove” or “Forget.” Then, turn off the Bluetooth on your laptop. At the same moment, turn off the JBL Tune 700 BT Headphones. Now, your jbl tune 700 BT headphones have been soft reset and ready to use.  Laptop (Mac): First, open System Preferences on your Mac. you can do it by simply clicking on the top-left corner at the APPLE Symbol and from the menu choosing System Prefences. Then, click on “Bluetooth.” Next, find the JBL Tune 700 BT in the list of connected devices. Next, right-click on the JBL Tune 700 BT and choose “Remove” or “Forget This Device.” Then, turn off Bluetooth on your Mac. At the same moment, turn off the JBL Tune 700 BT Headphones. Now, your jbl tune 700 BT headphones have been soft reset using bluetooth settings on your … Read more

JBL Tune 225 TWS Earbuds Asking for PIN: Connect Without PIN

JBL Tune 225 TWS Earbuds Asking for PIN: Connect Without PIN

If you’ve encountered a situation where your JBL Tune 225 TWS earbuds are unexpectedly asking for a PIN? Then, don’t worry – you’re not alone.  This common issue can be a bit puzzling, but fear not, as we’ve got you covered.  In this guide, we’ll walk you through some simple steps to help you fix the PIN problem and get your JBL Tune 225 TWS earbuds back to seamless, hassle-free listening.  Let’s dive in! Why Does JBL Tune 225 TWS Earbuds Asking For a PIN? The frustration of entering a PIN request when trying to connect JBL Tune 225 TWS earbuds is a common experience for many users. This seemingly simple step in the pairing process can be very irritating.  In this exploration, we discuss the reasons behind why JBL Tune 225 TWS earbuds ask for a PIN. Here are the reasons: 1. Pairing Security: When your JBL Tune 225 TWS earbuds ask for a PIN, it’s like a secret handshake for your devices. It’s there to make sure that when you connect your jbl tune 225 TWS earbuds to your phone or tablet, it’s a secure and private connection, keeping things safe from unwanted access. 2. Bluetooth Protocol: Think of the PIN as part of the language that Bluetooth devices use to talk to each other.  Your JBL Tune 225 TWS earbuds, ask for a PIN to make sure they’re speaking the same language and to add an extra layer of security against unwanted connections. 3. Customization and Compatibility: Another reason your JBL earbuds might need a PIN is for customization and compatibility reasons. This ensures that they work smoothly with a variety of devices. 4. Firmware Updates: Sometimes, new updates change the way earbuds and devices talk to each other. Make sure that both your earbuds and device have the latest software and can often sort out any issues. How to Connect JBl tune 225 TWS Earbuds Without PIN Now here, we’ll walk you through the process of connecting your JBL Tune 225 TWS earbuds without the need for a PIN. Say goodbye to PIN-related headaches! Restart Your Device Before you start, ensure that your JBL Tune 225 TWS earbuds have enough battery power to connect. Now, If Bluetooth is already on, turn it off on the device you want to connect to your Jbl tune 225 TWS earbuds.  This could be your smartphone, tablet, or any other Bluetooth-enabled device. Next, take both earbuds out of the charging case. They should automatically enter pairing mode.  If not, press and hold the power button on both earbuds until Blue light starts flashing. This confirms that your Jbl Tune 225 TWS earbuds are in pairing mode now. Then, restart the device you want to connect JBL Tune 225 TWS earbuds to.  This could mean turning off and then turning back on your smartphone or other Bluetooth device. Once your device has restarted, turn on the Bluetooth on your device.. Now, search for available devices. Your JBL Tune 225 TWS should appear in the list of available devices. Select your JBL Tune 225 TWS from the list.  Your Jbl tune 225 TWS earbuds will be connected to your device without showing the pop-up to enter the PIN. If Pin Pop-up still comes then you should move to the next method or step to complete your solution.  Do Manual Pairing  Another method to connect your Jbl tune 225 TWS earbuds to any device without a PIN code is to do it by manual pairing method.  Sometimes it happens that your Jbl tune 225 TWS earbuds were in the pairing mode already and they have been connected to any device previously.  This leads to a pop-up message to enter a PIN code to provide a secure connection commonly. For this you have to put your Jbl tune 225 TWS earbuds in pairing mode manually by disconnecting from the previous device. Here’s how you do it: First, Make sure your JBL Tune 225 TWS earbuds are turned on. You can usually do this by taking them out of their charging case. Now, check that your earbuds are not connected to any previous device. If connected then, turn Off Bluetooth from the device or simply forget the Jbl tune225 TWS earbuds from your device.  Next, put your Jbl tune 225 TWS earbuds in pairing mode manually. This usually involves holding down the Bluetooth button or a specific button on the earbuds.  Then, go to the Bluetooth settings on the device you want to connect the earbuds to (e.g., your phone, tablet, or laptop) and turn on Bluetooth. Then, On your device, search for available Bluetooth devices.  Next, Once your device discovers the JBL Tune 225 TWS earbuds, select them from the list of available devices.. Pairing Earbuds Separately  Another method to connect your Jbl tune 225 TWS earbuds to any device without a PIN code is to do it by pairing each earbud separately. Either left or Right.  Here’s how you do that:  First, take one of the left or right earbuds out of the charging case. “””Please, make sure that the second earbud is still in the case. “””” Next, Press and hold the power button on the earbud until you see a blinking light, indicating they are turned on. This also means the earbuds are now in pairing mode. Now, On your device (phone, tablet, etc.), go to the Bluetooth settings. Look for the JBL Tune 225 TWS-Left or JBL Tune 225 TWS-Right  in the list of available devices and select it to pair.  The name depends on what earbud you have chosen left or right.  If you can’t find it, make sure Bluetooth is enabled on your device. After pairing one earbud, wait for a moment. And then apply the same steps to your second earbud.  After pairing both earbuds with your device, wait for some time and your JBl tune 225 TWS earbuds will also connect to each other automatically. Now, let’s move to the next method! Do a Factory … Read more

How to Reset JBL Tune 225 TWS Earbuds: Easiest Ways

How to Reset JBL Tune 225 TWS Earbuds

Resetting JBl Tune 225 TWS earbuds can offer various benefits that can create a blasting music journey. Resetting the earbuds can resolve Connectivity Issues, Syncing Problems, improves Battery Life, and Improves Audio Quality.  In just a few simple steps, we’ve got you covered! In this guide,  we’ll walk you through every method to reset JBL Tune 225 TWS earbuds. Say goodbye to all the issues, as we’ve made resetting as straightforward as plugging in and pressing play. Let’s get started! How to Reset JBL Tune 225 TWS Earbuds Using Hard Factory Reset  The hard factory reset, also known as a master reset, involves wiping all data from a device, restoring it to its original factory settings.  This process removes not only user-generated data but also system files, essentially returning the device to its initial state.  It also has many methods to be done. Here’s how you can do it: Read Here: JBL Tune 225 TWS Earbuds Common Problems And Solutions Using Buttons on JBL Tune 225 TWS Earbuds To reset the JBL Tune 225 TWS earbuds using the buttons on the earbuds, start by ensuring that the earbuds are powered on. Press and hold the buttons on both earbuds simultaneously for about 5 to 10 seconds until you see the LED light on the earbuds flash or hear a confirmation sound.  This action typically resets the earbuds.  Once the reset is complete, you can proceed to re-pair the earbuds with your device.  Using Charging Case(If applicable) This guide is for those whose Jbl tune 225 TWS earbuds have a setup button on their charging case.  Begin by placing both earbuds into the case and ensuring they are properly charging.  Once in the case, close the lid.  Then, press and hold the button on the back of the case for about 15 seconds until the LED light on the front of the case starts flashing.  This indicates that the earbuds have been reset.  After the reset, open the case and take the earbuds out. You can now pair them with your device as if they were new.  How to Reset JBL Tune 225 TWS Earbuds Using Soft Factory Reset Soft factory reset, often referred to as a soft reset or reboot, involves restarting the device without erasing user data. It also has two methods that can be done to reset your Jbl tune 225 TWS earbuds. Here’s how you can do it: Using JBL Headphones App Start by ensuring that your earbuds are connected to your device and the JBL app is installed.  Open the JBL app and locate the JBl Tune 225 TWS in the list of connected devices.  Select the earbuds, and within the settings or options menu at the top, look for the “Reset” or “Factory Reset” option.  Click on confirm the Reset OR simply follow the on-screen instructions to reset your JBL tune 225 TWS earbuds. Once the reset is complete, your earbuds have returned to their default settings.  Using Device Bluetooth Settings To reset the JBL Tune 225 TWS earbuds using Bluetooth settings on your device: Start by ensuring the earbuds are connected to your device. If not? Then connect them to your device. You’ve to do it! After connecting, Go to the Bluetooth settings on your device and locate the JBL Tune 225 TWS in the list of paired devices.  Once found, click on it and click the option to forget or unpair them.  After successfully unpairing with your device, turn off the earbuds, Now, turn the earbuds back on.  Put them in pairing mode, usually done by holding down the button on your earbuds until you see a flashing LED light.  Lastly, reconnect the earbuds to your device by going back to the Bluetooth settings and selecting the JBL Tune 225 TWS.  This process will effectively reset the earbuds and establish a fresh connection with your device. Note: Make sure you follow each step to complete the resetting process of your JBl TUne 225 TWS earbuds using your device’s bluetooth settings.  When do you need to reset Jbl Tune 225 TWS Earbuds? Many situations arise where you feel like “breaking your JBL Tune 225 TWS earbuds’ ‘ or abandoning them for some other option or giving up. The main reason is often that people are not aware of when and in what problems we need to implement the solution of resetting them. So, below are the main and common problems your jbl tune 225 TWS can have: When there are connectivity Issues: If your earbuds are not connecting properly to your device or each other, a reset can often resolve the connection issues. When there are pairing Problems: If you are having trouble pairing the jbl tune 225 TWS earbuds with a new device, resetting them can help clear any previous pairing information and make the pairing process smoother. When Jbl tune 225 TWS earbuds Not Responding: In cases where the earbuds are unresponsive or not functioning as expected, a reset can be a quick and effective way to restore normal operation. When there are Charging Issues: If you notice that the battery is draining faster than usual, resetting the jbl tune 225 TWS earbuds might help improve battery life. When there are Audio Quality Problems: Issues with sound quality, such as distortion, may be resolved by resetting the jbl tune 225 TWS earbuds. Why Are My JBL Tune 225 TWS Earbuds Not Resetting?  Here are some common factors that might be contributing to this problem: Incomplete Reset Method: Ensure that you follow a correct and also complete the reset method for your JBL Tune 225 TWS earbuds. Not Sufficient Charging: As we have discussed before, If the battery level of your earbuds is too low, the reset process might not initiate successfully. Charge your earbuds fully before attempting to reset them. Bluetooth Connection: Make sure that your earbuds are not connected to any devices via Bluetooth during the reset process. Disconnect them from all paired devices before attempting the reset. Physical Damage: … Read more